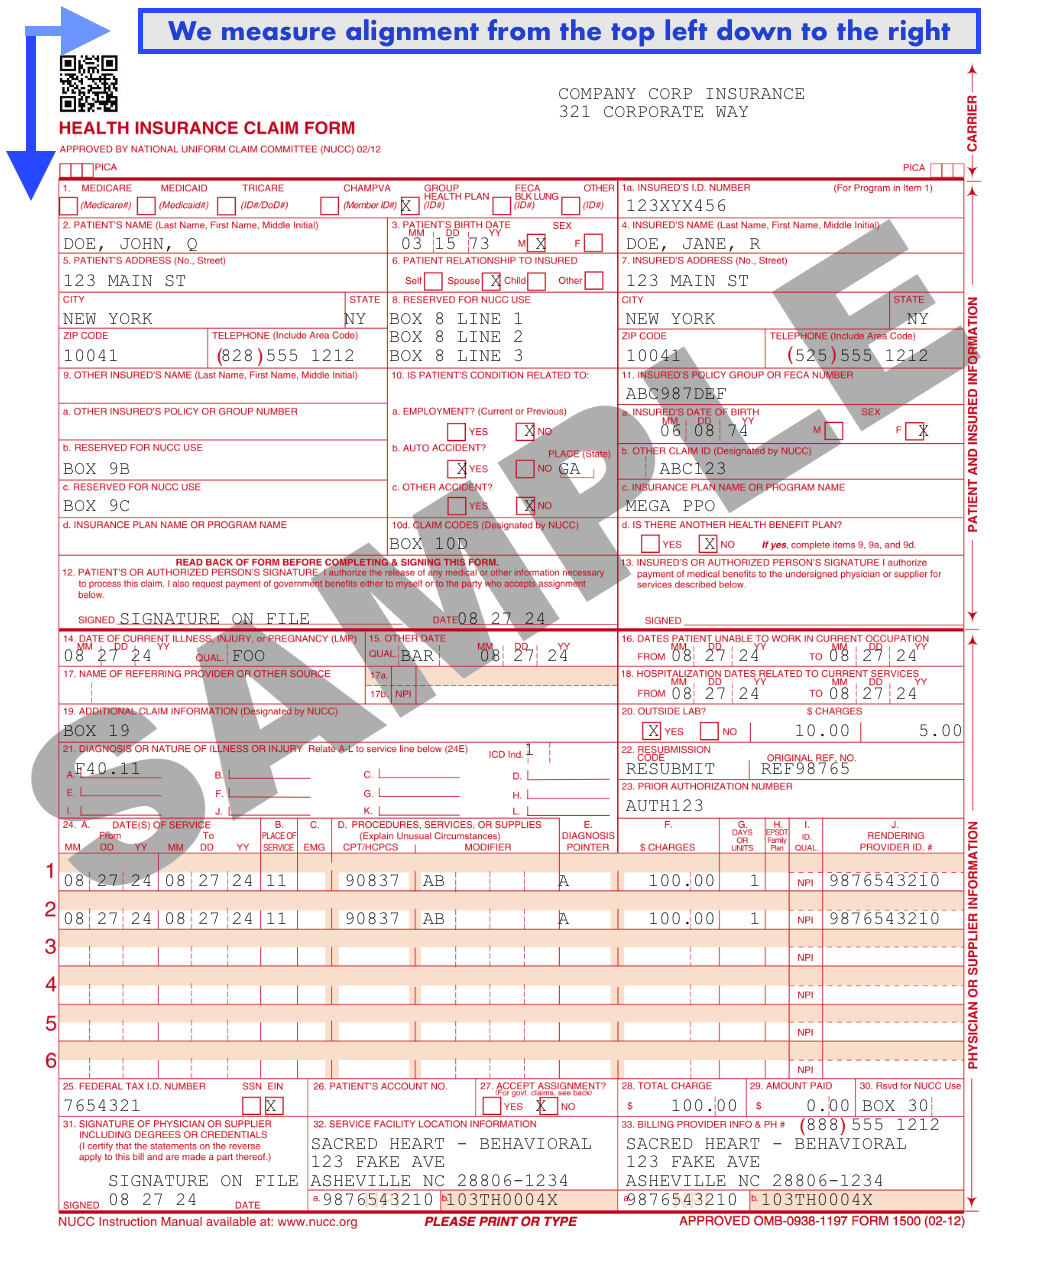
Printing Claims & Alignment
Aligning printed claims is an important task to ensure your claims get processed by your credentialed insurance company without delay! Get paid quicker with our billing experts.
While most are able to print without any adjustments, some printers may need some alignment adjustments due to various margins and inconsistent spacing. As we are all painfully aware, printers can be unpredictable! This article reviews making those adjustments.
In this Article:
Adjust Printing Alignment
In order to print the test alignment, we need to go to a printable claim first to make those adjustments..
To do so:
- Click (left menu)
- Find the Claim Actions section (top left) showing you all your pending claim to submit
- Click the section Print # primary claims

Listed all are paper claims ready to print:

Options:
- Before printing or downloading a claim, you'll want to make sure it's properly aligned first
- To the far right of any claim listed, click View

- Then click (top right):

How Margin Adjustments work:
- By default, we start at the top left corner
- We measure adjustments by pixels for exact precision
- The default is 0px by 0px, and most printers should be close to that alignment
- You can make adjustments from the top, pushing the form down
- Or make adjustments from the left, pushing the form to the right
Steps to adjust:
Example printout going down 20 pixels & to the right 10 pixels:

- Click to push the printout down 10 pixels
- Click ita again to bring it to 20 pixels down
- Then click to push the printout to the right 10 pixels
- You now have the same printout settings as the example (20 down, 10 to the right)
Visual Breakdown:
- To test your alignment, click the button (top right)
While test printing:
- Print on a cheaper blank piece of paper first
- Hold that up with a red pre-printed CMS-1500 form behind it and compare the alignment
- When close enough, try printing on an actual CMS-1500 form
Claims Appear "Squished" ?
You should only do this if your printed alignment is not a uniform measurement "off" — you may have shrink to fit enabled. This ultimately makes the margins larger, and the result is a smaller and offset scale printout which is not intended for "uniform" claim printouts at the same scale as the paper.
Example:
An example of this is when printed, the top text martin is is 1 inch off, aligned relatively well in the center, then 1 inch off on the bottom.
- In these cases, we recommend printing claims at a custom scale. More programs attempt to save and "scrunch" space, which works against us when printing "pixel perfect" claims.
Example on Google Chrome:
- Once you set the Scale to Custom / 100%, try printing first
- Then make any necessary adjustments and test print again, making small incremental changes
- When done, come back to our system and click (bottom left button)

Example on Safari:
- Set the Scaling to 100%, try printing first
- Then make any necessary adjustments and test print again, making small incremental changes
- When done, come back to our system and click (bottom left button)

Printing Claims
To print your newly adjusted claims, go to:
- Click (left menu)
- Find the left column Claim Actions section (top left) showing you all your pending claim to submit
- Click the section Print # primary claims

- From the list, check off on the left which claims you want to print
- The top left checkmark will select/deselect all
- Then click (top right, shown above):
Still having problems aligning your claims? Reach out to support and we can help!