Calendar Availability Set Up
Setting up your calendar availability is a vital process.
It allows you to define your usual schedule of availability in an overlay on your calendar for staff to see.
If you offer your clients the ability to schedule online from the patient portal, it limits them to self-schedule only when you're available!
In this Article:
- Setting up Availability to Provide Therapy Sessions
- Viewing and Editing your Availability
- Adding an Exception
- Switching between Exceptions and Availability Date Ranges
- Viewing your Availability on your Calendar
Follow these handy steps below to set up your availability.
movie Video:
Setting up Availability to Provide Therapy Sessions
Depending on your roles, you can either set up for:
- As a provider → yourself
- Or as an owner or manager → edit anyone in the group (click here to bring you to those steps)
As a Provider:
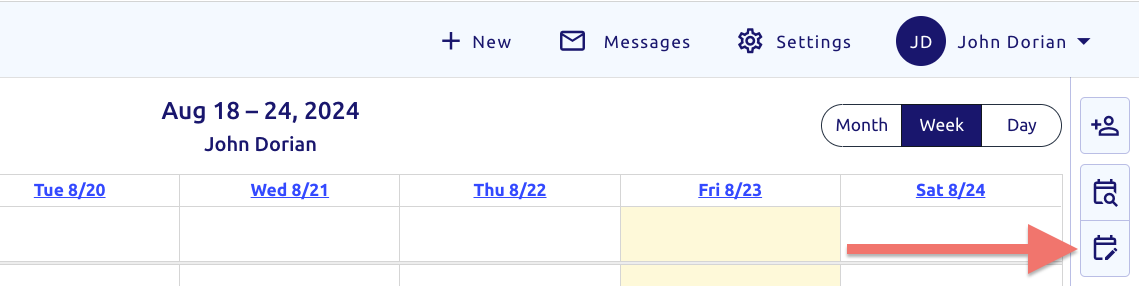
- Click (left menu)
- Select from the top right menu:

- Click here to bring you to the next section
Owners or Managers:
You can edit the availability of any provider in the system:
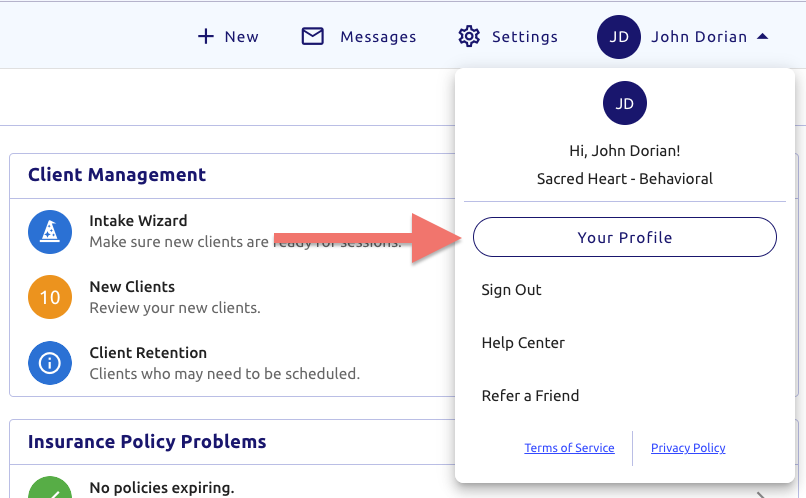
- From any screen click your name (top right):

- From the popup, underneath your name and practice click
- You'll notice an additional ribbon near the top
- This allows you to quickly switch between other staff member profiles
- Click the dropdown shown here, picking the provider you wish to edit:
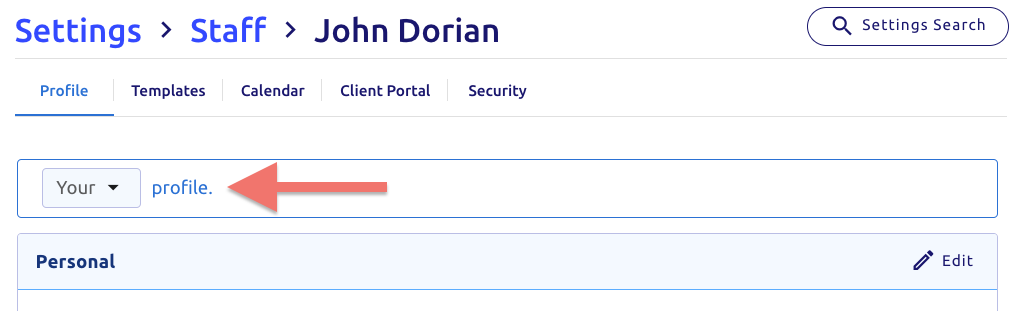
- Find the section Calendar (top tab)
- Find the bottom section Weekly Availability
- Click (far right)
Now, lets get a rough idea of your schedule:
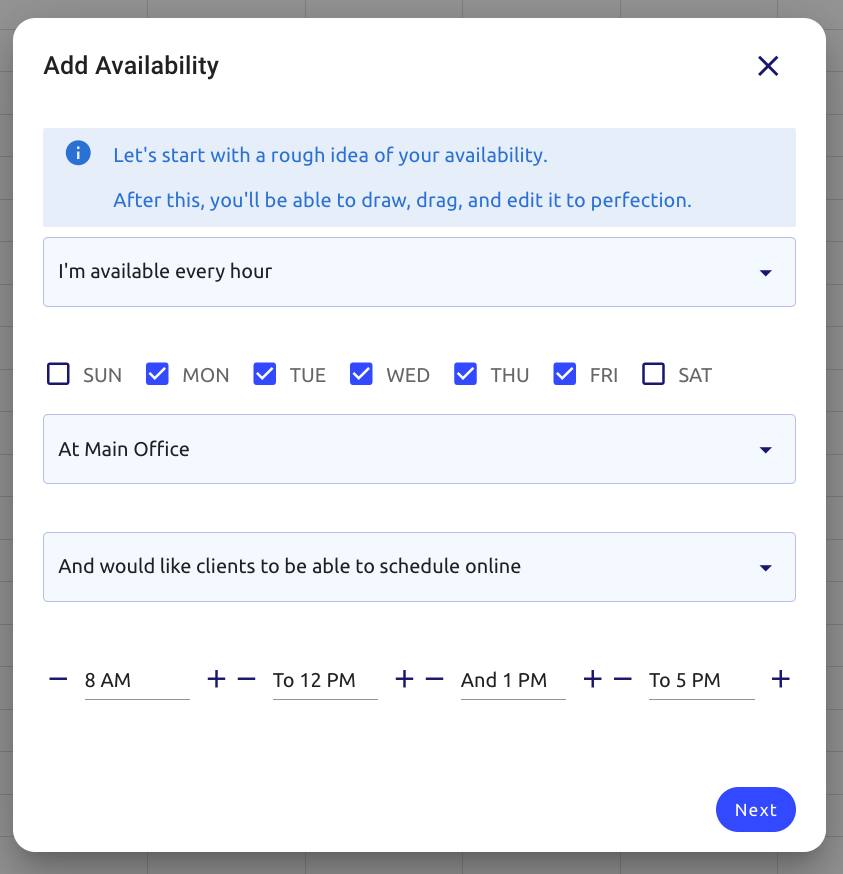
On the Add Availability page:
- if not already set up, you will want to set up a schedule that's close to what you typically provide
- Don't worry! We can 'sculpt' this further later
- Select the Office if you have multiple
- Then choose if clients can schedule online or not
- If you have integrated telehealth or Zoom, you can chose between in person, telehealth, or both
- You can also adjust the start and end times of your morning and afternoon, split with an hour lunch
- Don't want the split? Simply drag the section down in the next set of steps to cover it
Viewing and Editing your Availability
Now, You'll see your availability as blocks of time.
- Click and hold the bottom center of the availability block to stretch it or shrink it
- Click, hold, and drag to move the entire block
- Click anywhere on the schedule to create a block you can edit and adjust
- We go off of 5 minute intervals for ultimate customization, so make sure the start and end times are as expected.

Right menu availability options
Clicking on each slot brings up right menu options for each availability slot.

Each slot options:
Location: If you have multiple locations, here you can change that
Time slot sizes: Edit the available time slot lengths when clients self schedule, beginning at the start of your availability span.
language Allow clients to self schedule online: If clients can schedule on the client portal - consistent with your availability here and client portal settings in your profile.
If you have the telehealth addon: Either our integrated telehealth or integrated zoom:
You'll additionally have these other options:
domain Available in Personvideocam Available via Telehealth
People not using telehealth will only have a singular "available" option, not in person/telehealth.
You can also delete this slot via the bottom right Remove this slot delete button
Each slot also has iconography shown above and below, shown to you within each slot in the editor without having to click each one:

- Click and hold to drag the slot to another time or date
- Tip: set the start time first when dragging, then drag the slot down to expand it
- Hover over the bottom center of the section, then click and hold to drag it down
movie Video:
Example:
- Clicking on a section and editing properties on the right
- Deleting a section
- Creating a new section
- Resizing a section
Adding an Exception
At it's simplest core, availability is a weekly recurring schedule.
You can add an exception to your usual schedule if you wish to.
Exceptions:
- Have a start and end date date
- Only one is required: A start time and/or end time (but you can have both)
- An exception completely overwrites your availability set for that date range
Your exception will be the new availability for that date range, completely tossing aside your "normal schedule."
- Click the button (far right menu)
- Select the start and end dates for the different schedule
- Then proceed like you did to set up your usual availability
movie Video:
Examples and Solutions:
Your schedule changes at the beginning of this upcoming year and has no end date:
- Add an exception to start 1/1/xx with no end date
- Set a rough idea of your availability
- Then draw your new availability for the new year
You have a day you want to add 2 slots to, but wish to retain your existing availability too:
- Add an exception for that date (same start & end date)
- Make a note of the day of the week (for below)
- Then ensure the availability for those days of the week has your regular schedule plus the 2 slots
- Any other days of the week will be ignored
You have a month where your availability changes:
- Add an exception for that month's date range
- Set a rough idea of your availability
- Then draw your new availability for that month
For multiple days off or out of office, instead of an exeption you can just use the schedule for that.
Just click on the top all-day section for the starting date, set the name, and click (beside at the bottom right).
You can set it to all day and/or repeat. Meetings block availability.

Switching between Exceptions and Availability Date Ranges
Switching between Exceptions and Availability Date Ranges
Once you add an exception, you'll notice a dropdown menu bar that you can use at the top to switch between the availability dates and the various exceptions. Click on that to switch between the various date ranges and make your adjustments as needed.
movie Video:
Click (top right) when you're finished making changes to return to the calendar.
Viewing your Availability on your Calendar
Now, when you go back to your calendar biew, you will see your availability highlighted by this translucent color, guiding your eye to easily know your usual availability.
Scheduling an appointment within that availability slot will default to that office location (but you may always override this with the button when scheduling)
You and your staff can still schedule a patient outside of this availability if you have a need to do so. That location will be scheduled on your group's primary or default office location.
