Batch Client Statements, Superbills, and Flexible Statements
There are several types of statements that can be generated for clients. If you are in a group practice, statements can be produced for a particular therapist or produced for the practice as a whole.
This article covers how to create a batch of standard statements.
content_copy Batch Option:
- Statements (this article)
description Individual Client Statement Options:
Statements can also be produced for a single client, or produced as a batch for all clients with outstanding balances.
Additionally, if you have elected in your patient portal settings to allow clients to view account balances, they will, by default, be able to view every session charge and payment made on their account
In this Article:
- Batch Statements
- Review Previously Generated Statement Batches
- Generate a Statement for a Single Client
- View or Delete a Statement on the Client's Billing Screen
- Download or Print a Statement
Batch Statements
To create Batch Statements for the practice or a particular provider in your group practice, go to:
- (left menu)
- Then click on (top right)

Now work from top to bottom with our statement walkthrough:
Options (Step 1 of 4)
First, specify the Therapist(s)
- Click Select All therapists (top) if you wish to create a practice-wide statements batch
- Or select a particular provider (or multiple) that you wish to create statements for:

Next, select the type of conditions you wish to produce your statements by, either:
- Clients with a client responsibility
- All clients with non-zero balance
- All clients seen regardless within a date range

Make additional selections on the page, including:
- Statement delivery preference
- Practice or Provider information included
- Return Address
- Using client legal vs. preferred name
- Including a statement message (all clients)
- Whether to include a physical return page (for payment)

Select Clients (Step 2 of 4)
The next screen will provide you with an aging report of the clients included in the client criteria from the first page:
- Mass select all / none (top left checkmark box)
- De-select or select any client(s) for statement creation with the checkmarks (far left column)
- Add a custom message (optional) on the statement for a particular client (far right)

e-Delivery:
When ready click
Preview (Step 3 of 4)
Here is where you can preview and review your statements for accuracy. Here we show you exactly what we will be sending to each and every selected client.
Make a mistake? Want to make a change?
If you decide you want to change a statement setting, or add/remove a client from the list of statements to generate, click the top center button to go back a step in the process.

After reviewing, click (top right)
Send & Download (Step 4 of 4)
Last step!
You will receive confirmation that the electronic delivery of the statements was completed.
- Click to return to the Billing Dashboard
- Click to download a PDF of all the generated statements to your computer
- Click to load a pop up with a PDF you can print

Review Previously Generated Statement Batches
You can review recent statement batches and re-print or download the pdf by going to:
- (left menu)
- Click the line below the Statements (bottom right) section to open up the list:

You should now see a list of statements you’ve produced in the past 30 days.
filter_alt tune You Have Options!
- Edit the filters by clicking: the (top left) or the button (top right)
- Click (top right) to download this report as a CSV (spreadsheet) or PDF

Beneath, to the right of each statement batch listed you'll see two buttons:
print → To print the statements
Generate a Statement for a Single Client
View or Delete a Statement: Client Billing Screen
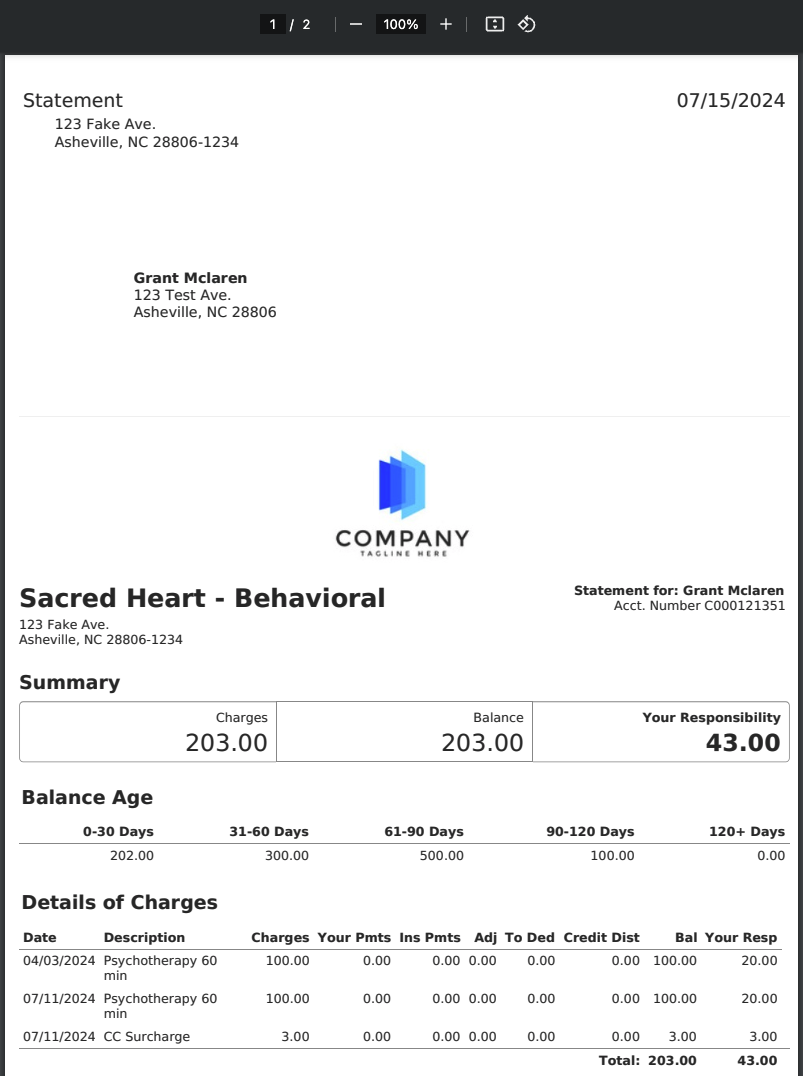
Whenever a client has had a statement produced on their account, the statement is listed on the Billing tab on their profile:

- To permanently delete a statement, click: delete (same line, far right)
- Clicking on the date or Client Statement (left side) top open up a PDF copy of the statement
Example:
Not seeing the statement?
If you clicked on the statement but it didn't load, you may have pop ups disabled. Please review our article on enabling pop ups for just our website.Download or Print a Statement
Most browsers provide handy built-in PDF controls directly in the browser at the top right corner.
Here you have two options:
This would save the PDF to your local device. This gives you options like sharing this receipt with others like with our secure messaging or other outside options you've carefully reviewed.
We also recommend securely erasing delete any files with PHI in them immediately when you're done with them, and instead securely keep them within our system for future reference!
This will load your browsers normal printing function.
Configure if needed and print as you normally would any other document easily!
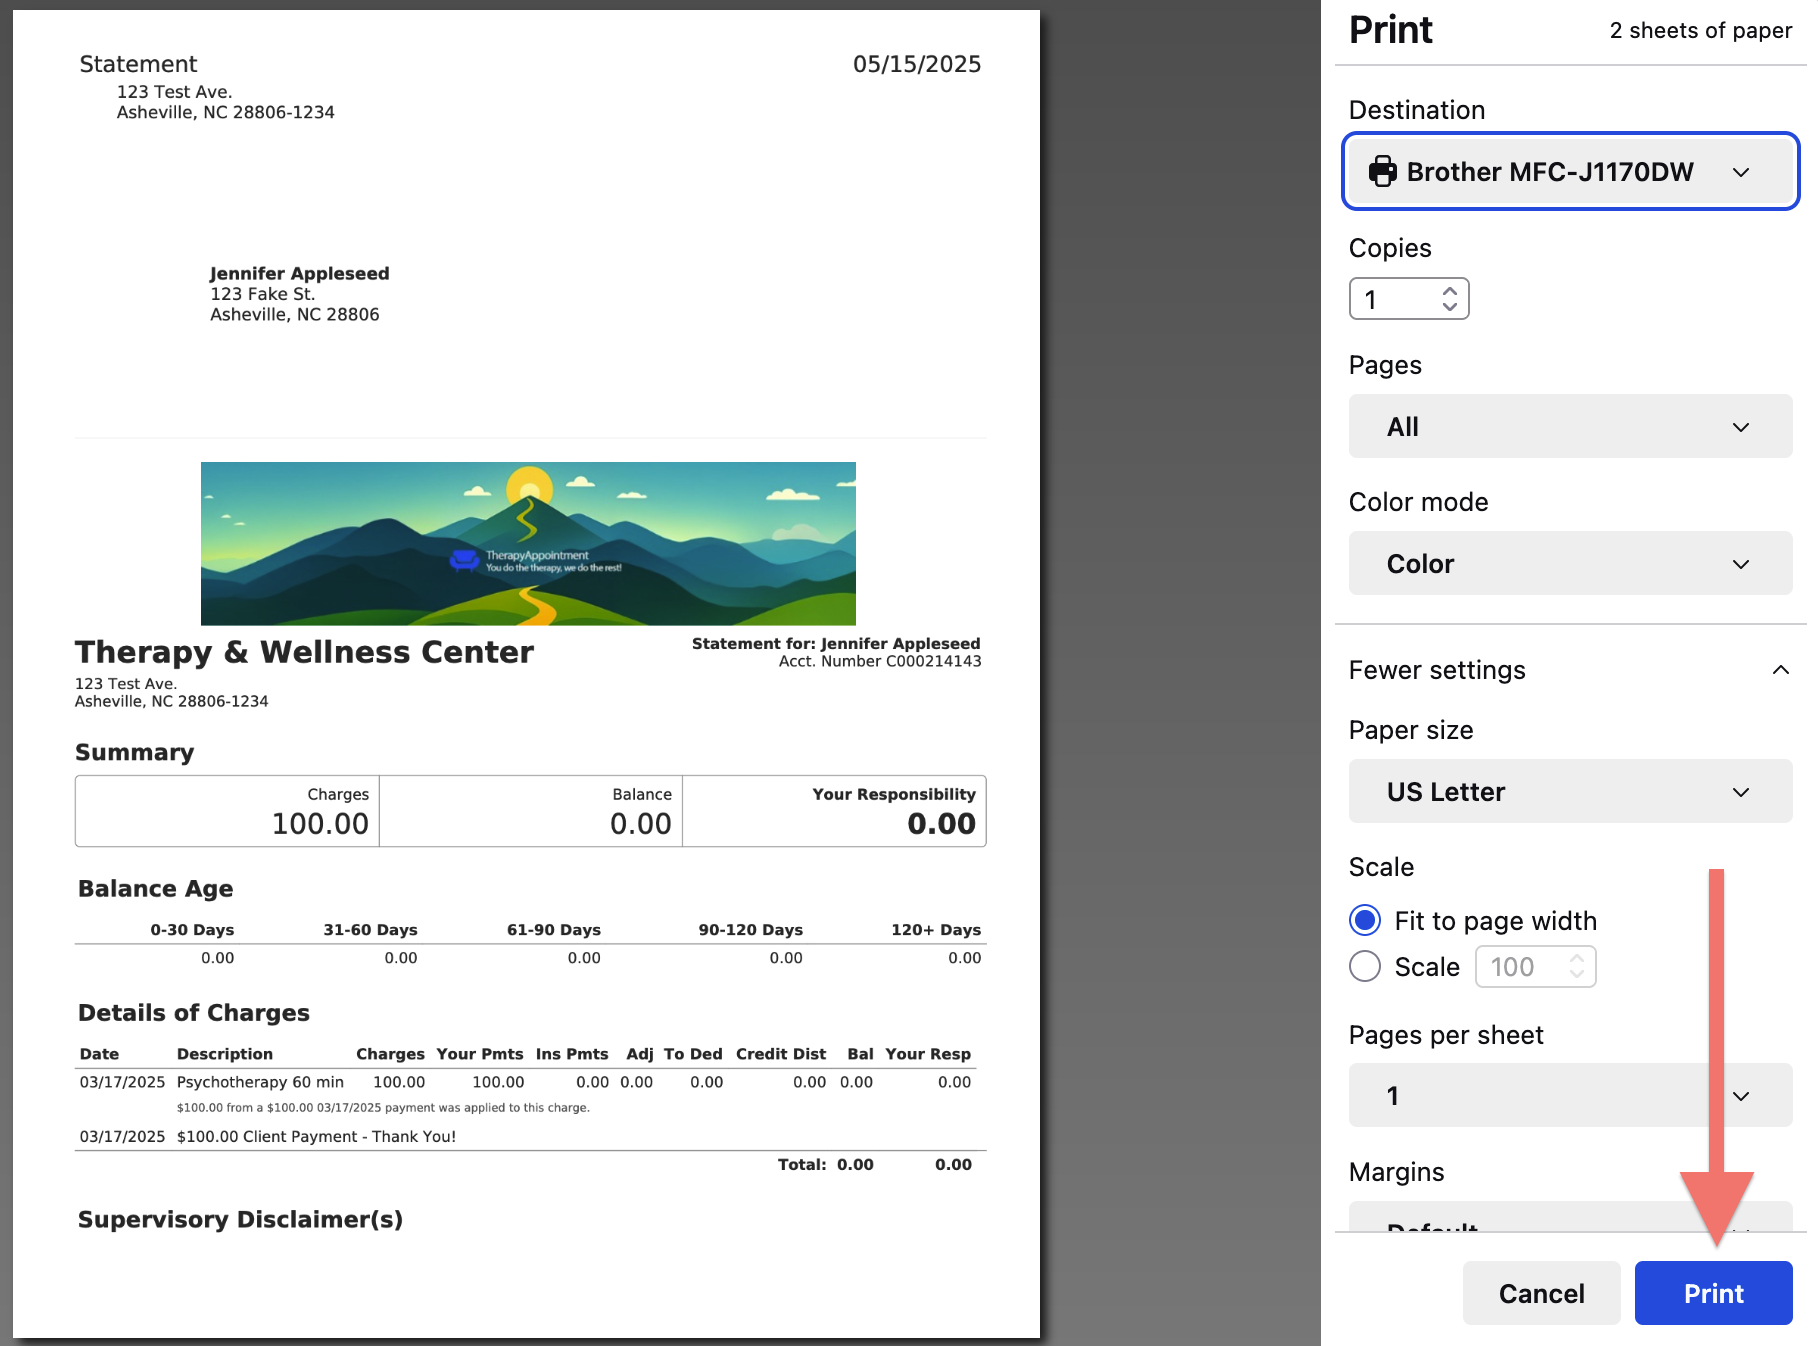
Example in Google Chrome:
Questions about other browsers? If unsure, please consult their documentation on the PDF / printing feature.
