Entering an EOB: Individual Client
Looking to manage payment amounts from an insurance company for a specific date of service?
Read on below where we explain how to enter individual client Explanation of Benefits (EOB) into the system.
In this Article:
Enter an Explanation of Benefits (EOB)
Follow these steps, go to:
- (left menu)
- Click the client's name, bringing you to their profile
- Click Billing top tab
- Then click (far right menu):

info Note: You can also do this by going to:
- (left menu)
- Click (top right)
- Enter the client name on the right and click
Overview:
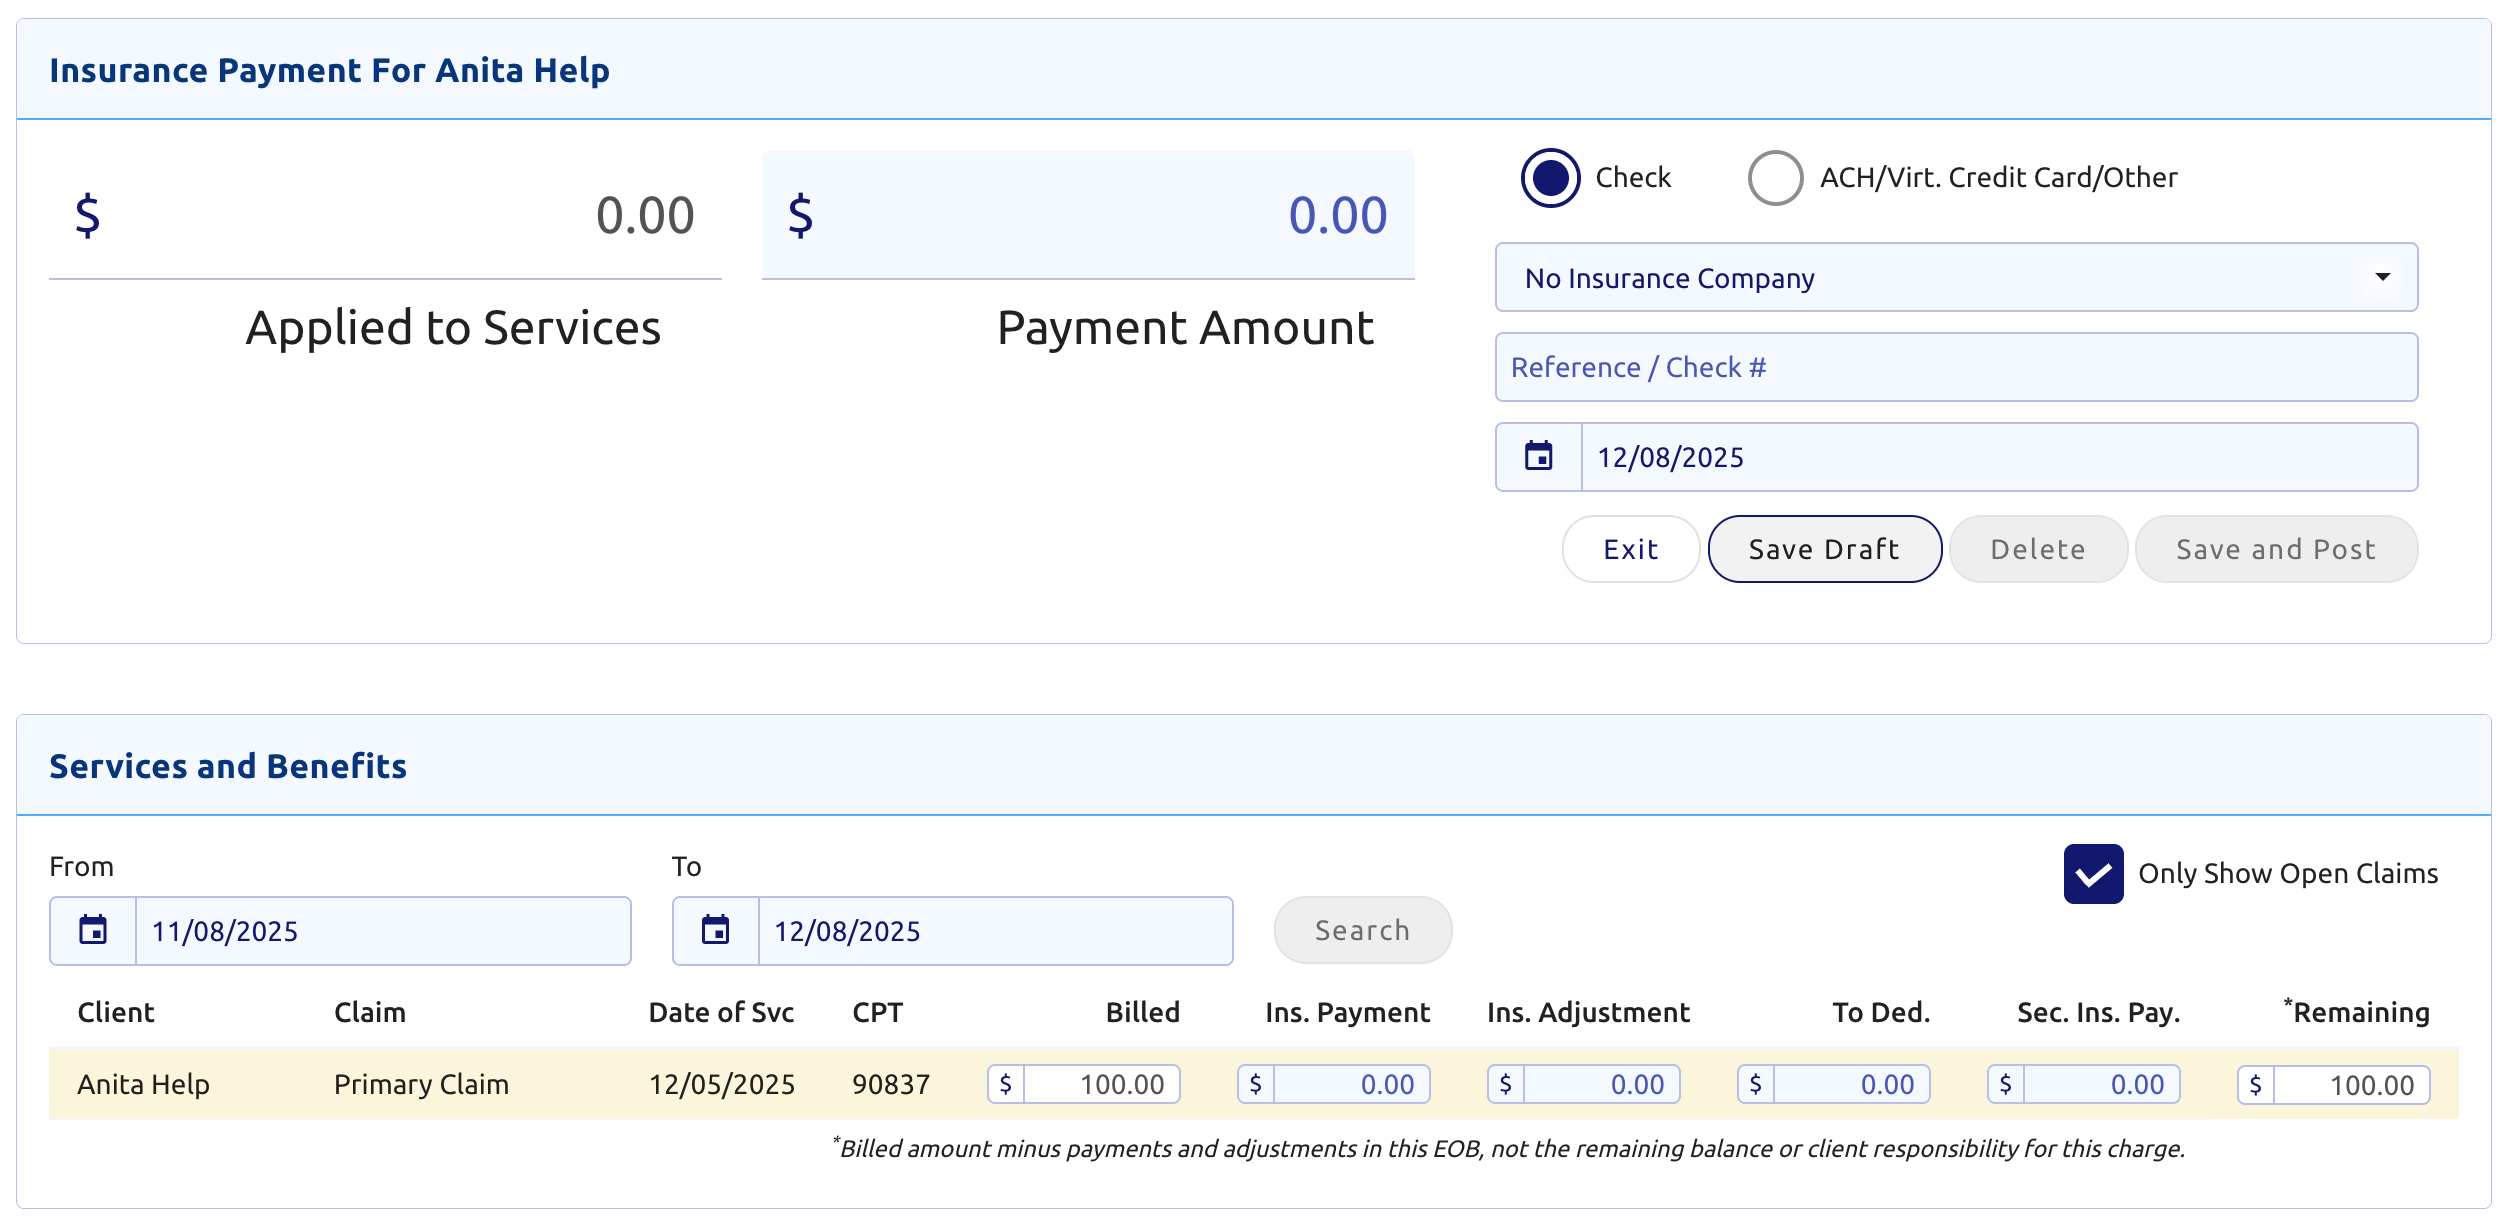
- At the bottom, adjust the From/To dates if needed beyond the default past 30 days, then click
- If the Date of Service is still not visible, uncheck the option Only Show Open Claims to the right:

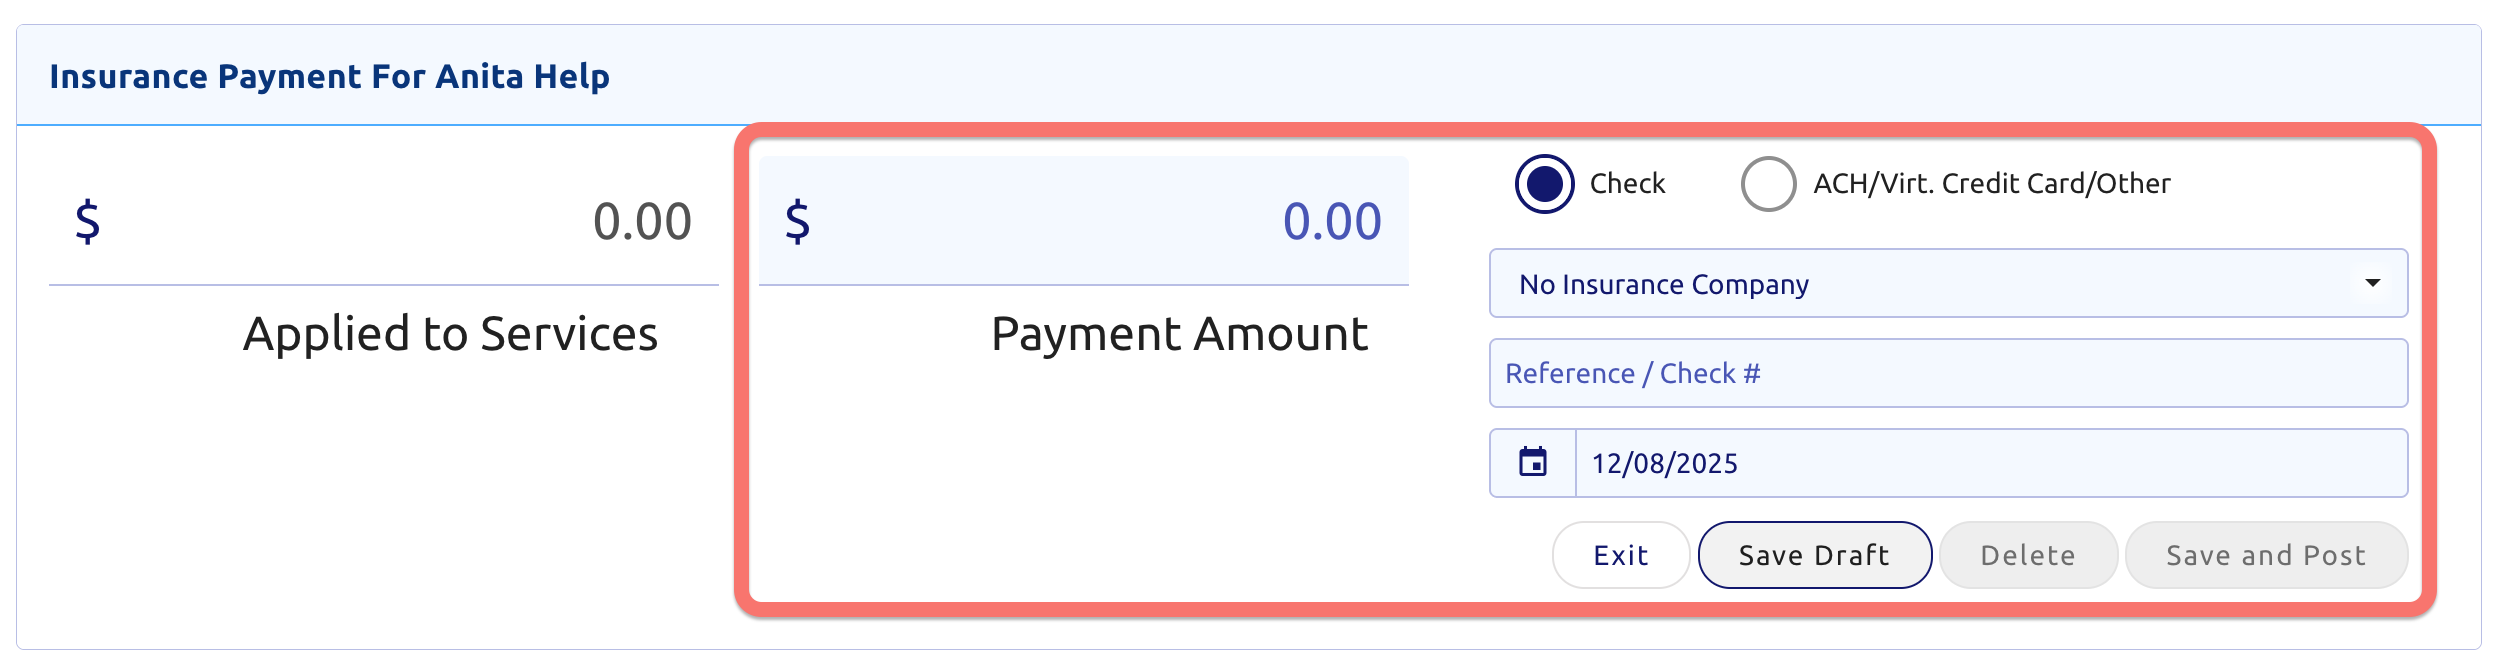
- Within the top Insurance Payment section enter the:
- Payment Amount
- Whether it's a Check or ACH/Virtual Credit Card
- The insurance company
- Reference or check number
If insurance was paid via credit card: click here for more direction.
- Distribute the top payment amount inside the bottom Services and Benefits section here:
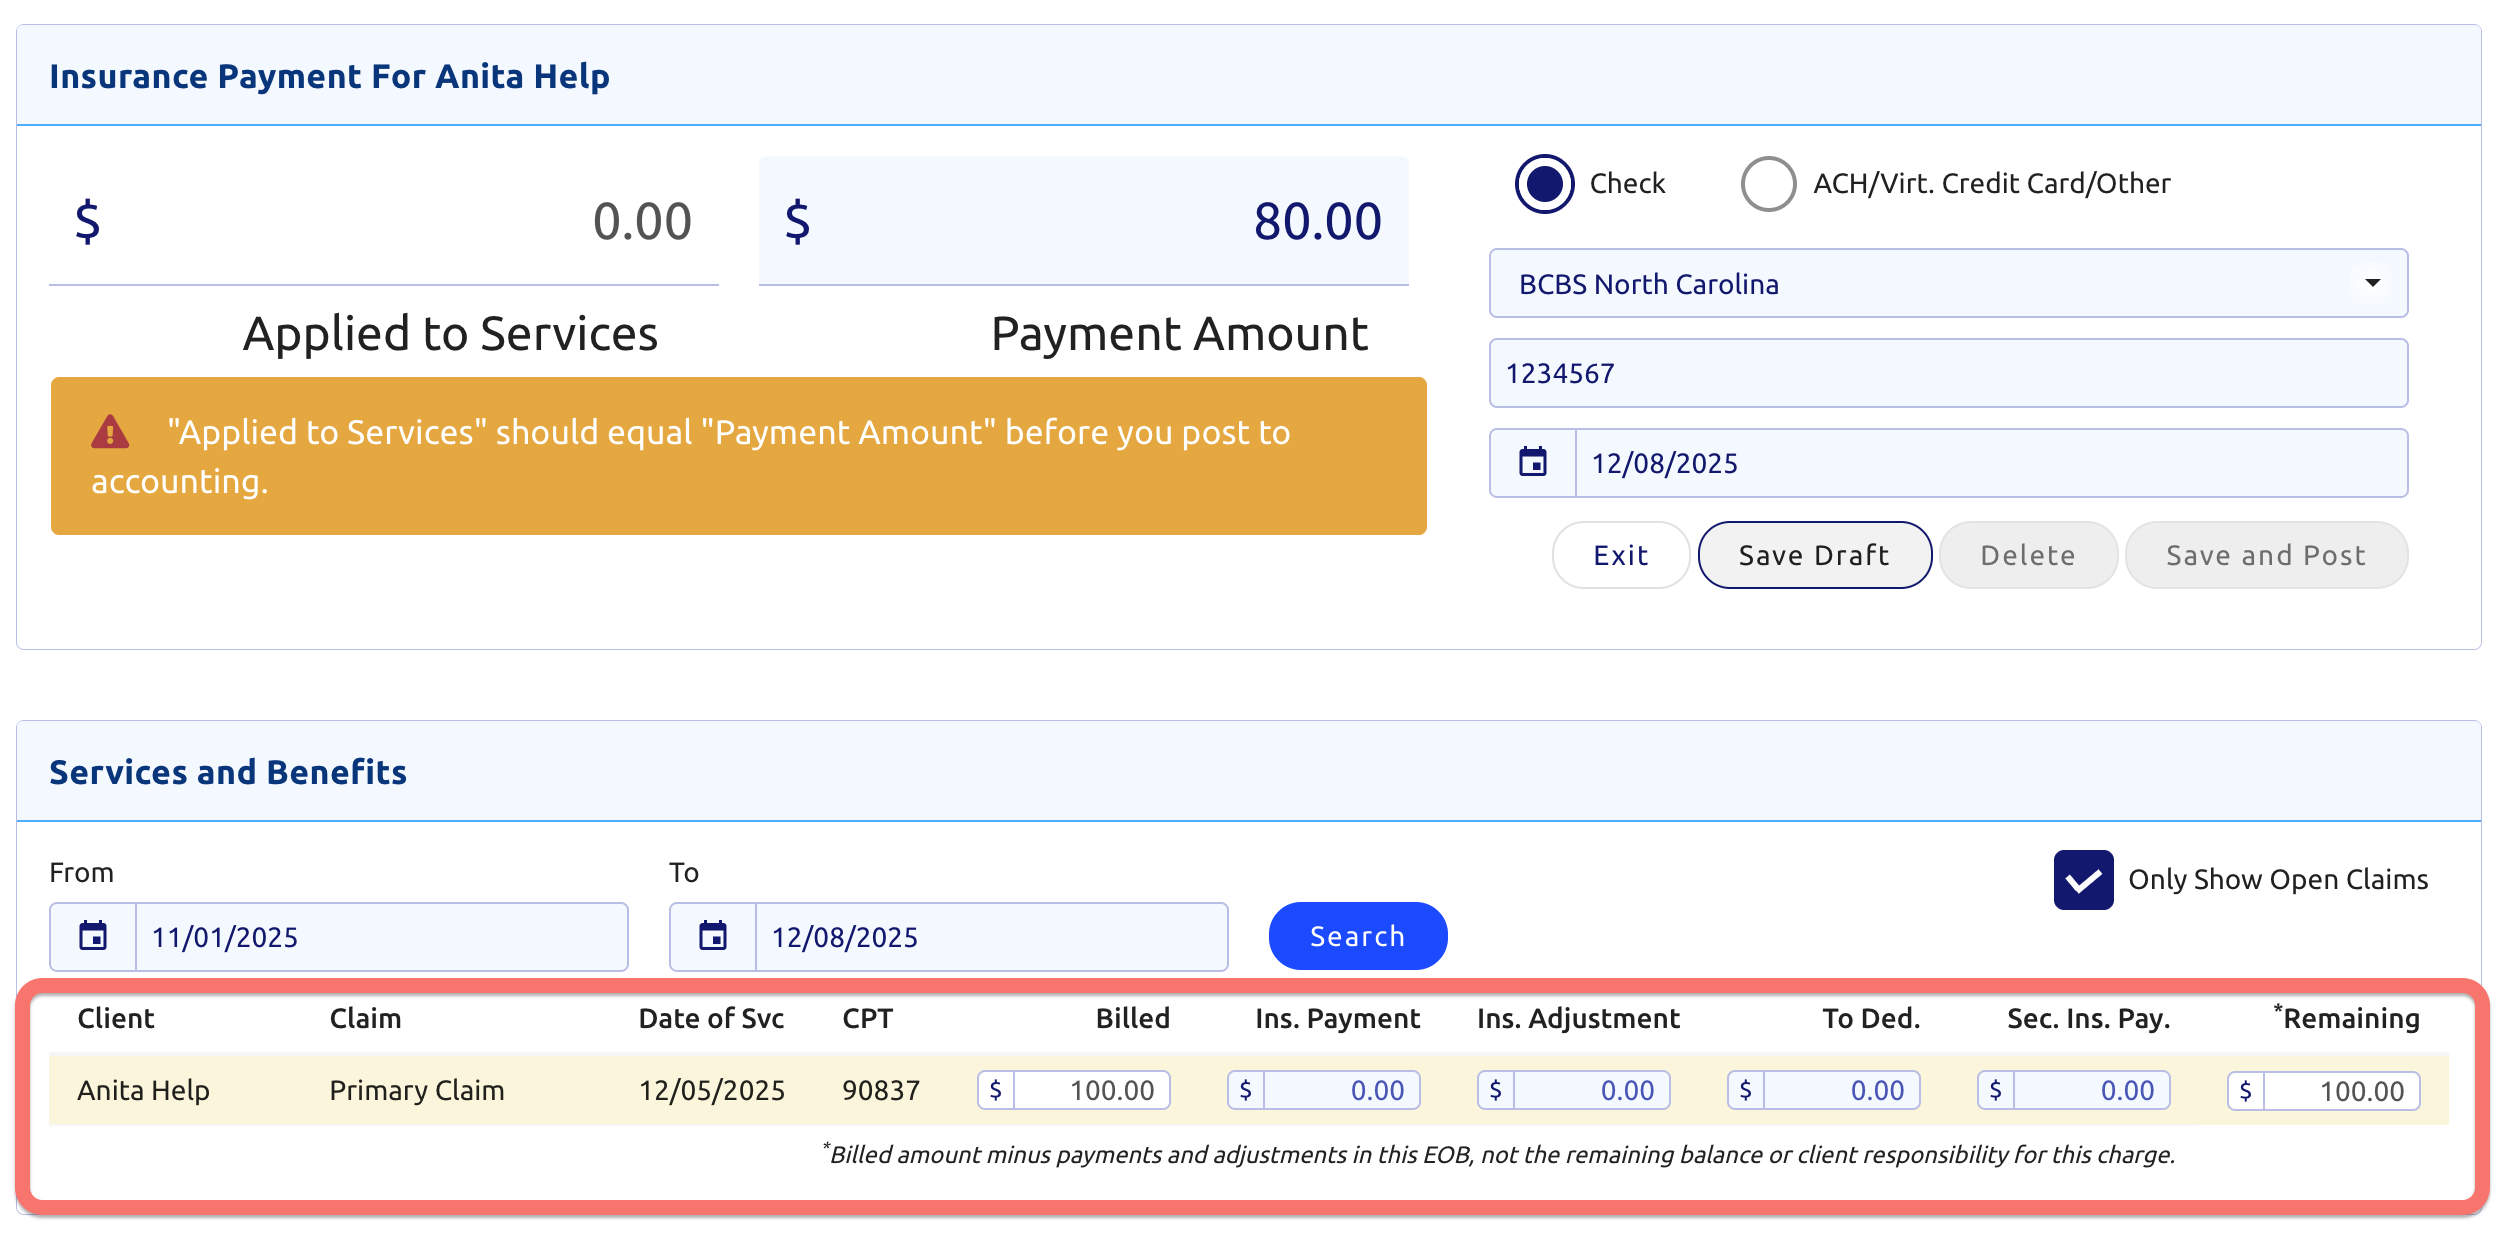
- Find the column Ins. Payment at the bottom:
- Enter the amount the insurance company paid for that date of service
- Make sure it's on the line that matches the Date of Service on the check
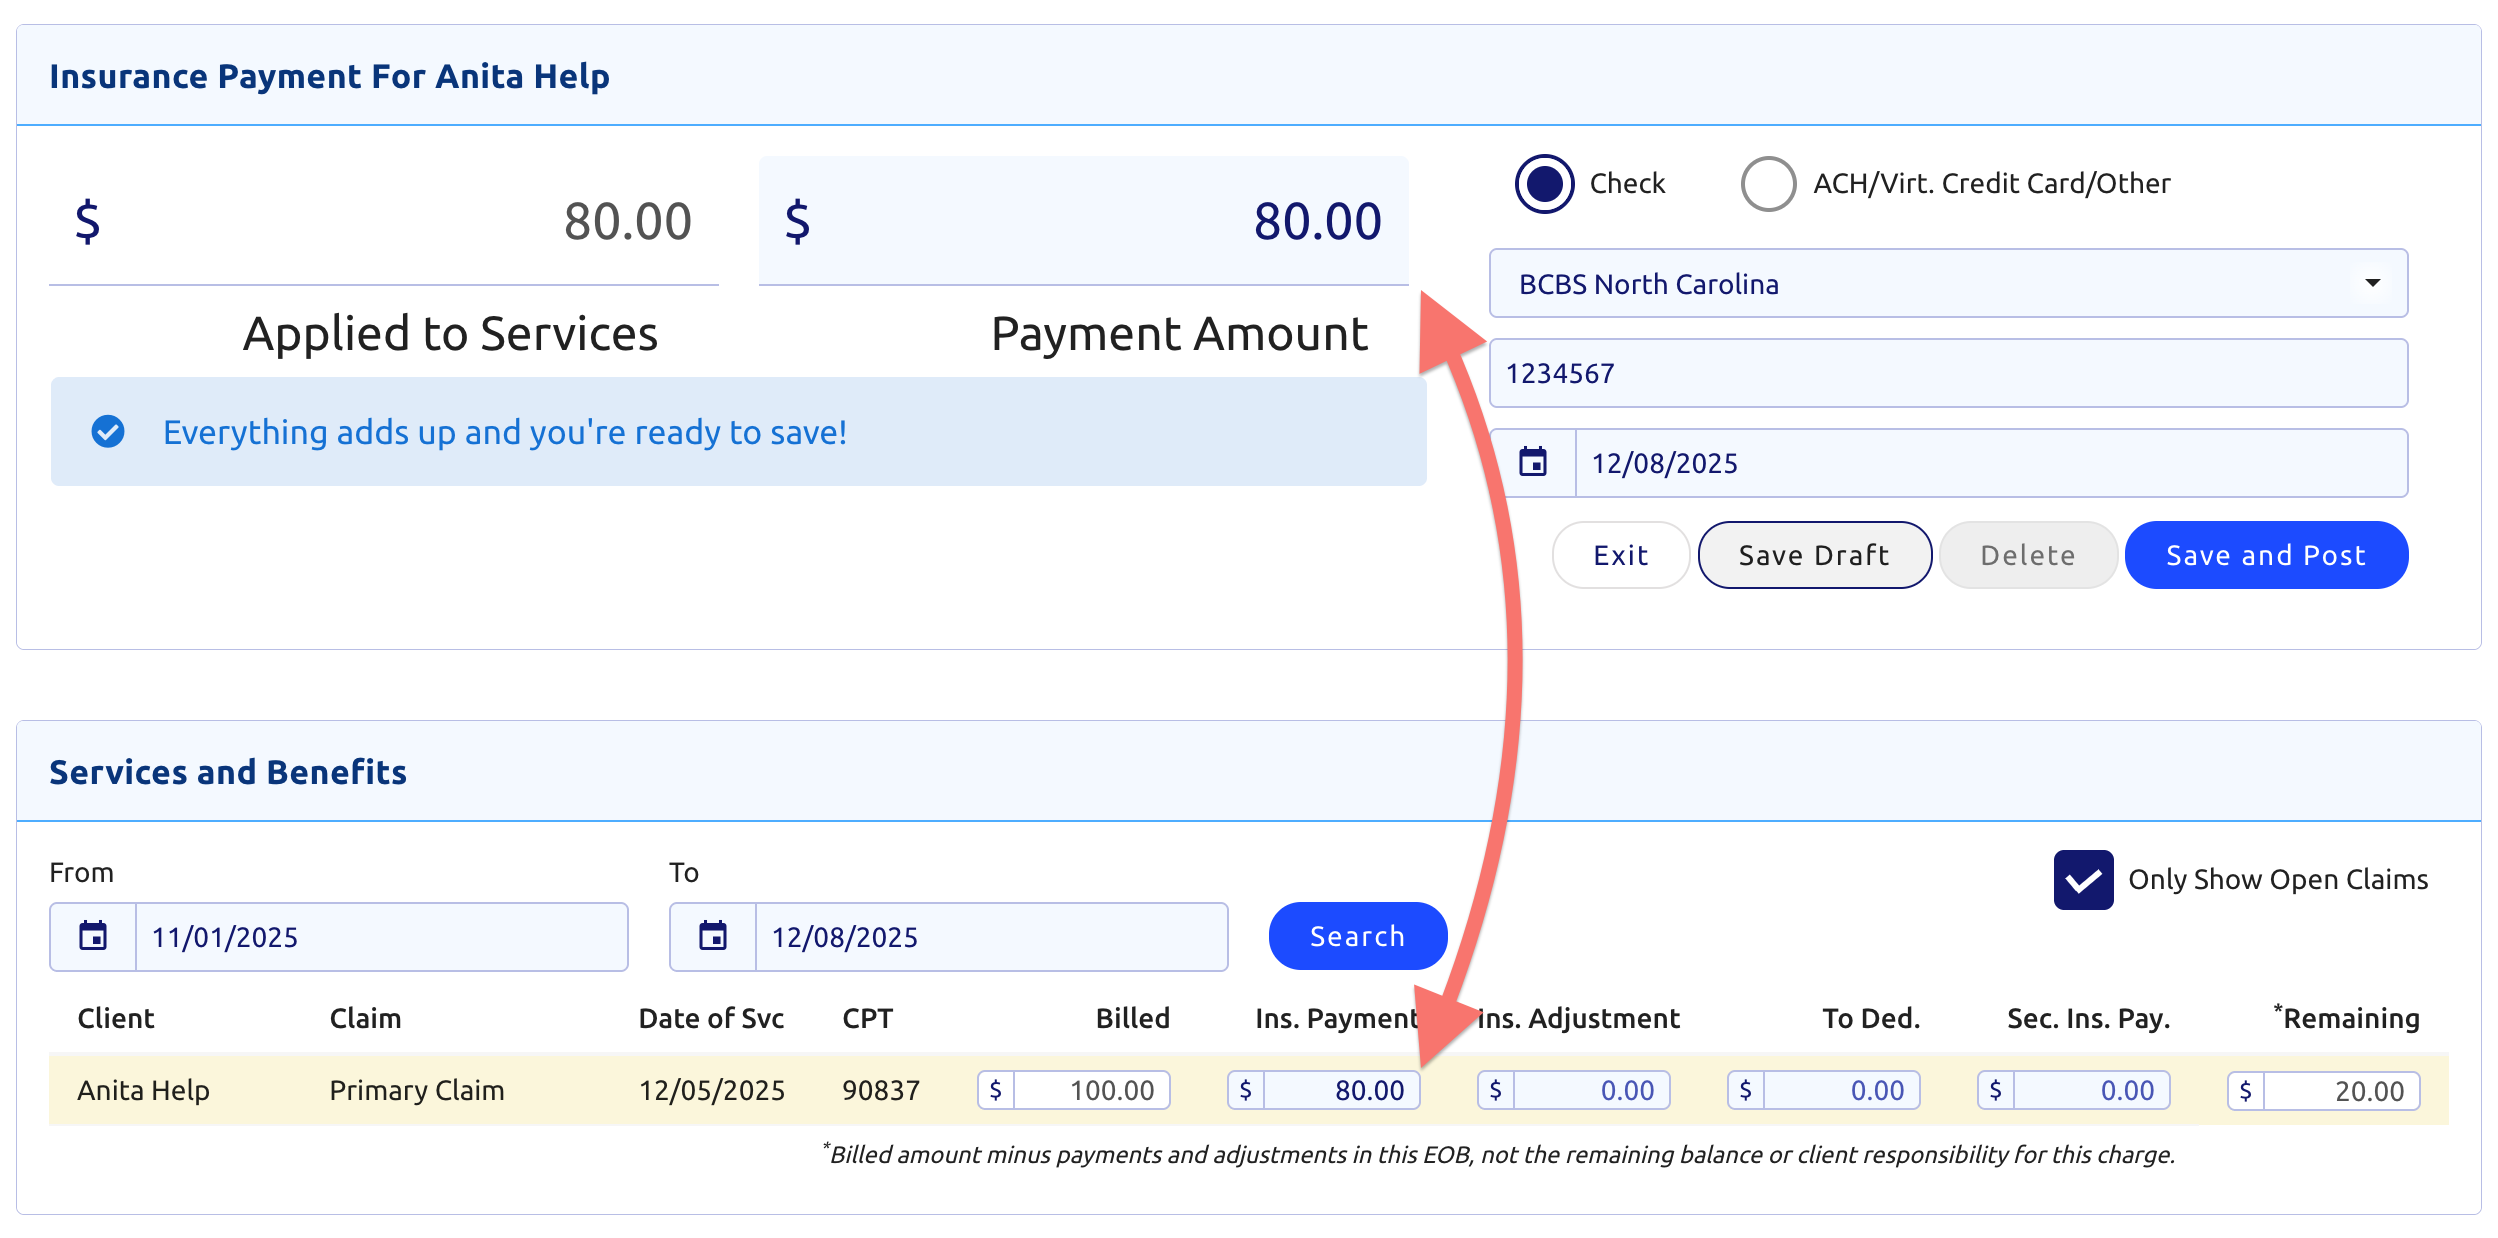
- To the right of the Ins. Payment column enter any insurance adjustments
- When finished click (top right)
Note: The remaining column (far right) will reflect the amount the client is responsible for, even if it's already been paid.
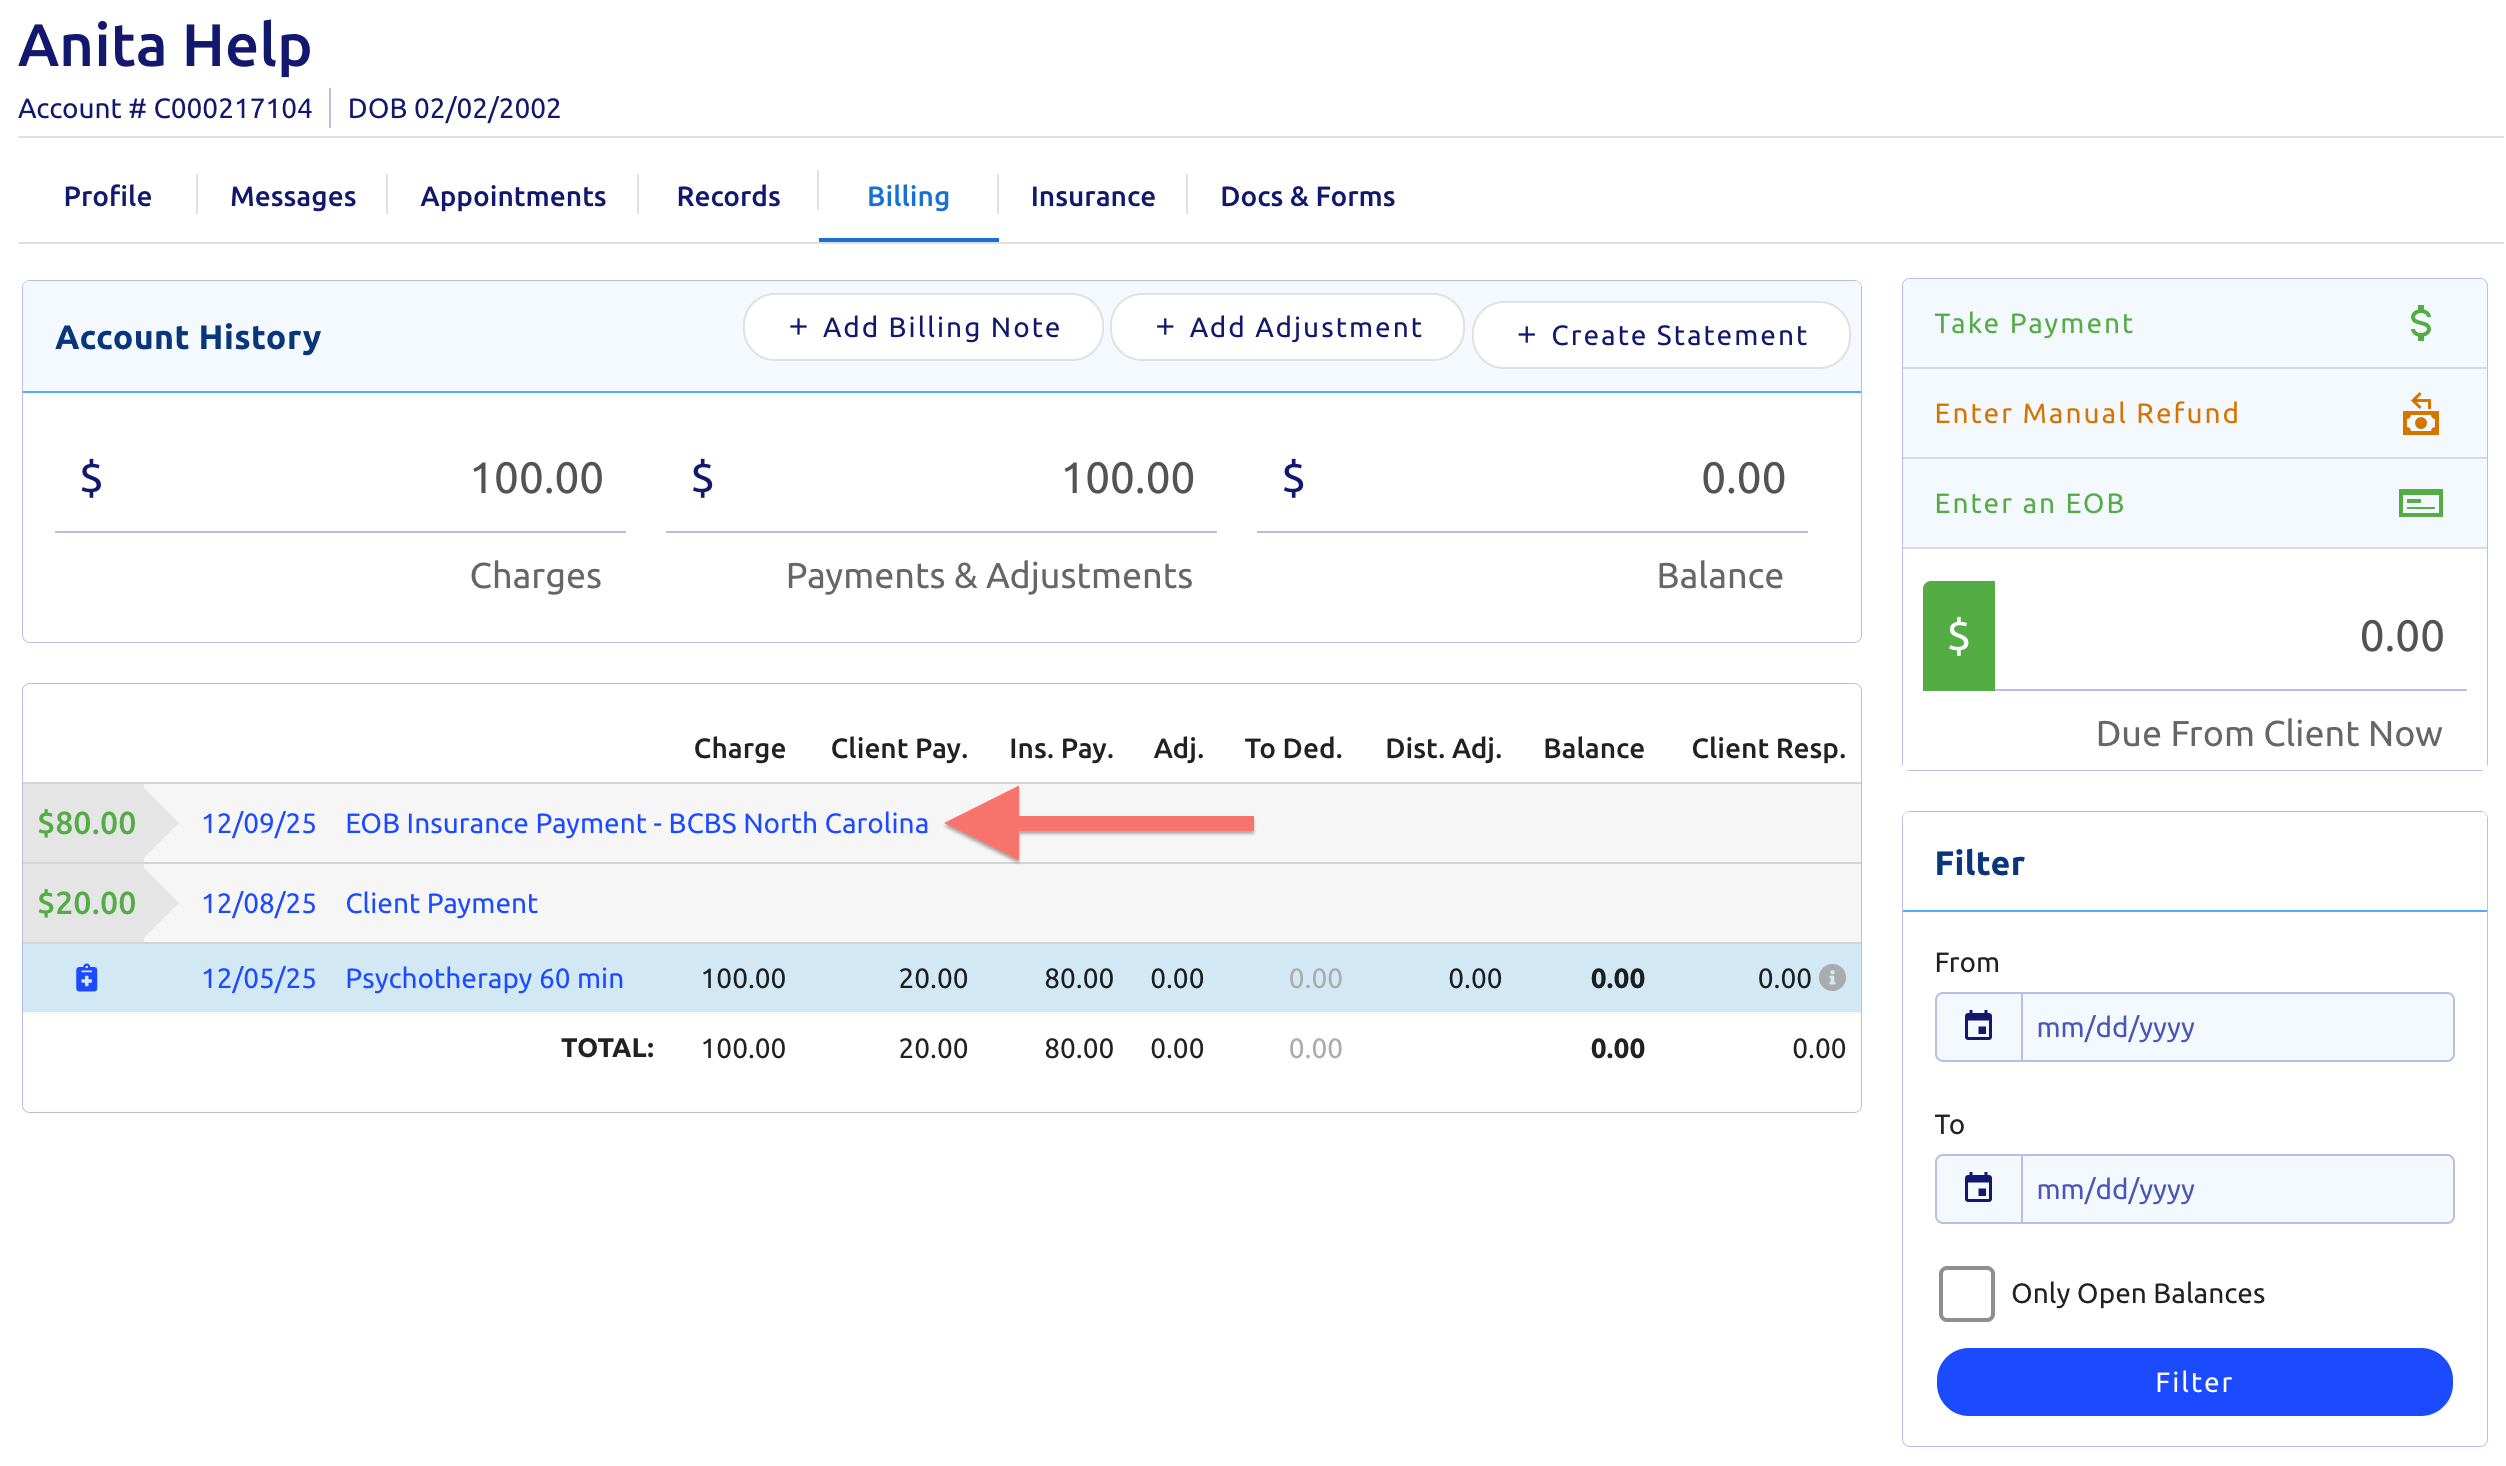
You'll then see the EOB listed on the Billing tab shown here:
Enter a Secondary EOB
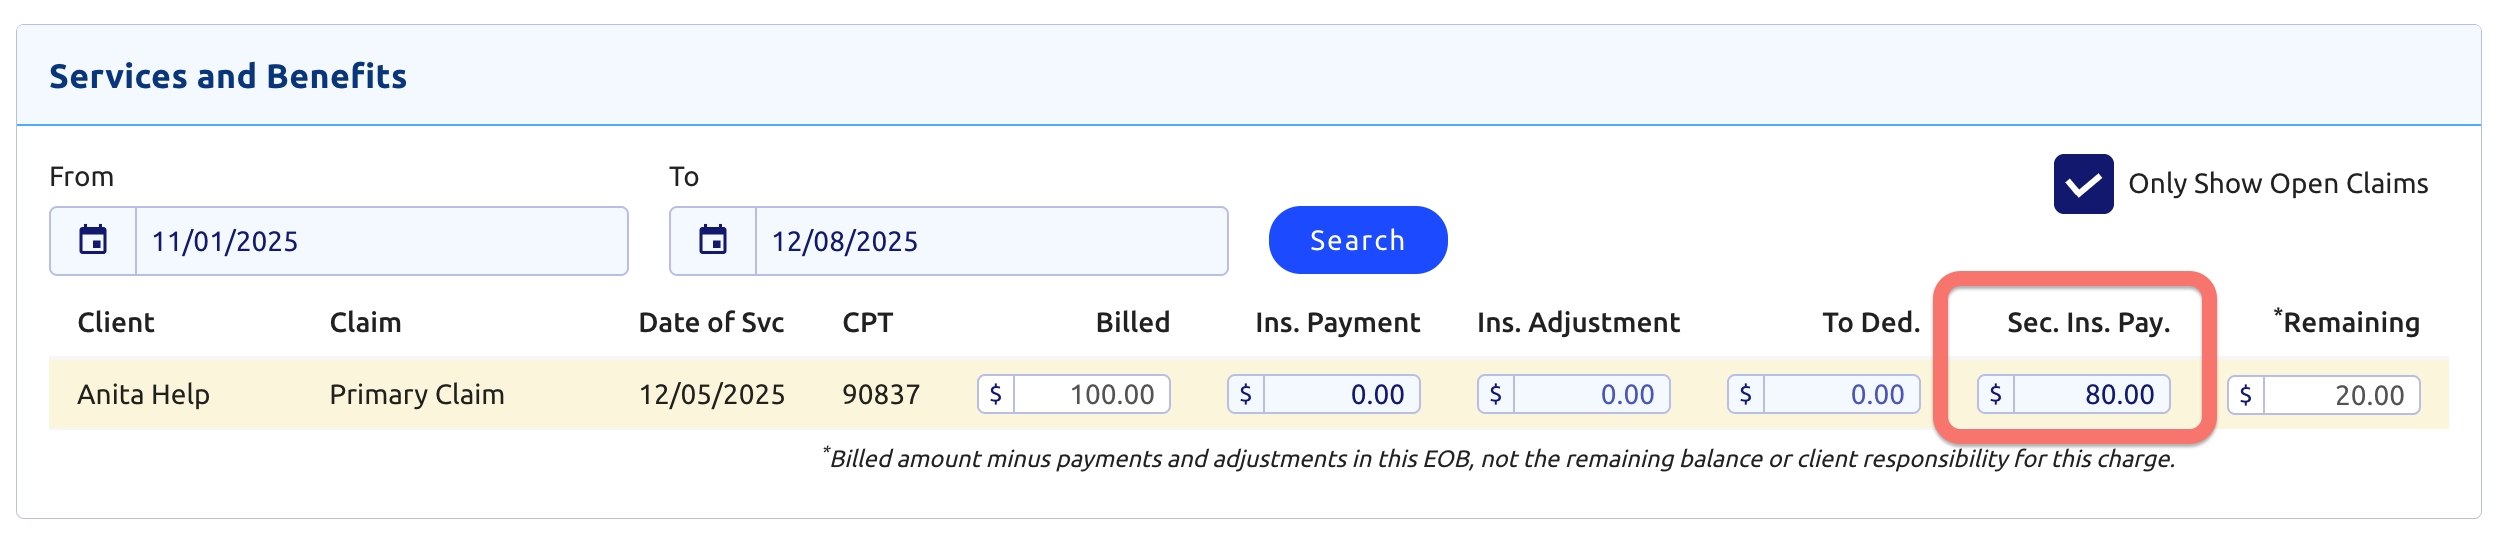
Entering a secondary explanation of benefits is almost identical to posting a primary EOB shown above.
- Just enter the payment in the Sec. Ins. Pay. column on the far right instead:
- When finished click (top right)
Note: Do not enter anything under the Ins. Payment or Ins. Adjustment column.