Data Import From another EMR/EHR
Save time importing clients from various sources!
Have an export from another system? Or want to manually enter client demographics in a spreadsheet for a quicker 'batch' client creation process instead of one by one?
Save some time and hit the ground running with your entire client list from the beginning, or upload more at anytime!
We give you the ability to import client data, offering two template options:
- Simple (no insurance) and
- Advanced ✨ (with insurance)
Switching from Simple Practice? Let us help!
Reach out to mail support@therapyappointment.com. Let us know you're importing client data from Simple Practice. Our support team can assist with securely importing clients. Allow us to do the work, saving you time and effort!In this Article:
- Download Client Data Import Template
- Simple Client Data Import
- Advanced Client Data Import (use if your clients have insurance policy information to import)
- Upload Data Import
- Troubleshooting
- Troubleshooting Data Import
- Group Practices
movie Full Video:
Download Client Data Import Template
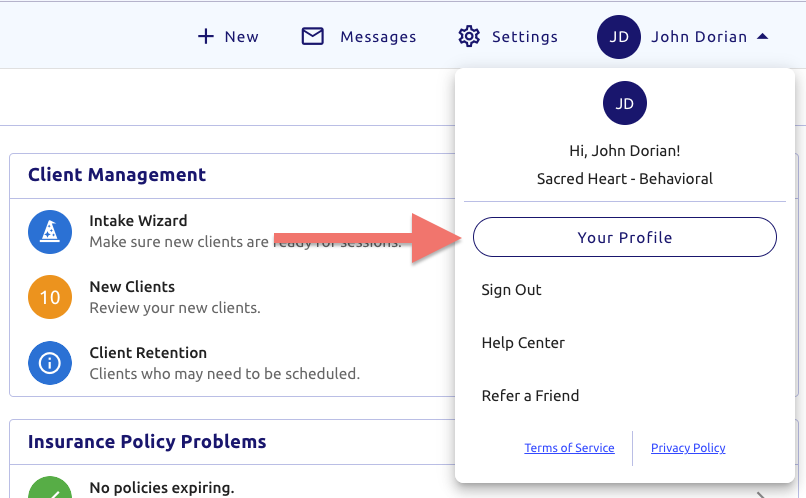
- From any screen click your name (top right):

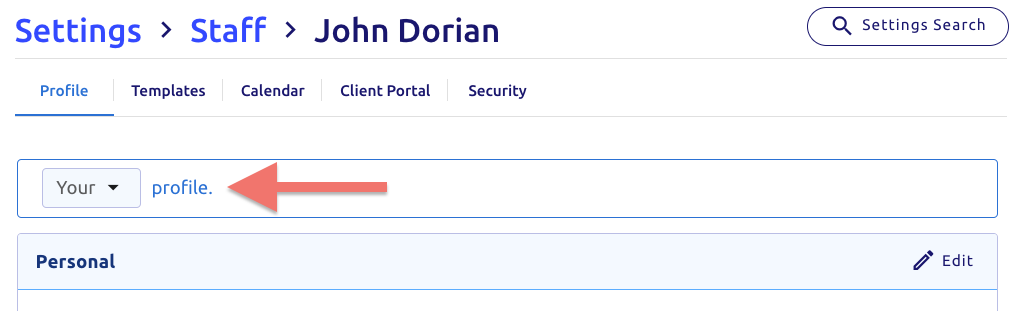
- From the popup, underneath your name and practice click
- Find the section Client Data Import shown here:

- Click here to move on to the next section for more details
Are you an Owner or Manager?
You'll also notice an additional ribbon near the top, allowing you to quickly switch between other staff member profiles. Click the dropdown shown here:
movie Video:
Which Data Import Type Should I Pick?
That depends! Ultimately it comes down to if your practice takes insurance or not:
check Take insurance? Use the Advanced import
- To continue with steps, click on whichever Step 1 option you chose:
Simple Client Data Import
The simple client data import allows you to import basic client demographics into our system using an easy to use spreadsheet.
The spreadsheet template is a .xlsx file capable of being opened by most spreadsheet applications.
Once you've downloaded your Simple import, you'll notice the following columns:
- First Name *
- Last Name *
- Not Required
- Date of Birth
- Address Line 1, 2, and 3
- City
- State (dropdown, pick)
- Zip Code
- Phone Number
- Gender (dropdown, pick - you can further customize this after uploaded)
* = Required
house Include any portion of an address?
- If so, you must include the remaining fields as well, none of them can be blank
- Address lines 2 & 3 are optional

Advanced Client Data Import
Select this option if your practice takes insurance and you want to import that data.
Set up your insurance companies before importing clients!
It's important to ensure all the insurance companies that are going to be billed are already set up in your Insurance Library. Read more on that process here.The spreadsheet template is a .xlsx file capable of being opened by most spreadsheet applications. In addition to the simple demographics, this also includes insurnace information.
Once you've downloaded our Advanced import, you'll notice the following columns:
- All the columns of the above simple import, plus:
- Insurance Company Name
- It is a dropdown box, pre-populated from your existing practice insurance
- Each client's specific insurance information
Note: If you opt to pick an insurance company from the dropdown for a specfic client, all the following columns below here are required: M through Y
- Insurance Policy #
- Relationship to Insured (dropdown, pick)
- Insured First & Last Name
- Insured DOB
- Insured Address lines 1,2, and 3
- Insured City
- Insured State (dropdown, pick)
- Insured Zip Code
- Insured Phone Number
No problem! Just don't pick an insurance company, or enter any insurance fields for the client.
Upload Data Import
- From any screen click your name (top right):
- From the popup, underneath your name and practice click
Are you an Owner or Manager?
If you're completing this for another staff member (provider), download & upload the import file on that staff member's profile.
You'll also notice an additional ribbon near the top, allowing you to quickly switch between other staff member profiles. Click the dropdown shown here:
- Find the section titled Client Data Import shown here:

- Download the template of your choice
movie Video: Create Import
Once you save the file as an excel (.xls) file:
- Click on the Step 2 for either option
- On the new popup click
- Select the import file from your computer
- The system will first confirm the file is a valid .xlsx file, then click
- After processing, we confirm and show you the amount of clients we found
- Click

movie Video: Upload Import
Having troubles? Click here to troubleshoot your data import.
Troubleshooting Data Import
Recieve an error message when attempting to import your file?
The system automatically downloads another copy of your import to your local ~/Downloads folder.
build_circle Lets Start Fixing Things!
Open the newly downloaded file & fix all cell areas highlighted in grey / pink, example shown below:
Apple Numbers:

Microsoft Excel (Online):

Additionally, hovering over the top row of cells (ex: Phone Number, or Email) with your mouse will also show you the correct format for that specific column that you can compare against the discrepancy.
Examples:
- No First or Last Name
- A misspelled email address (carefully check)
- A phone number that doesn't include 10 digits
Common Hang-ups:
- Make sure you are starting on the second row (colored green)
- Not using the drop-downs for fields like "insurance company name" as well as "gender"
- You must click on the cell and use the dropdown to select the values
- Otherwise the system will not recognize it
Enter any insurance information?
Insurance is an "all or nothing" thing. If you include any insurance values, you have to fill them all in or the import will fail. To clarify these are columns M through Y
note_stack Two productive tips:
Copy & Paste:
- If the dropdown formatting is removed from that particular cell
- Or you want to repeat dropdown answers (like gender or insurance companies):
- In a cell dropdown, pick a value
- Then copy the cell and paste it to another cell for another client
- Alternatively, click & drag that cell down for multiple selections
Importing Zip Codes beginning with a 0
For the zip/postal code for either (simple or advanced) data import, enter a tilde` before the 0 in the zip code, so for example zip code 01234 should be input as:
`01234
What symbol again?
The ` key may also show the symbol ~ on it as well, shown here (top left corner):
Group Practices
There are some special considerations for uploading your data into TherapyAppointment if you are a practice of two or more providers. First, assess how the clients will be accessed:
group The group typically uses a ‘team treatment model'
Where more than one provider treats or documents on a client.
- Create a triage account
- Next, upload all of the clients to this triage account.
- When completed, go to each client’s profile Records tab
- Then share with providers who will be treating the client
person A 'team treatment model' is not typically used:
Clients are treated typically by only one provider → the occasional client may be seeing more than one provider in the system.
Here you essentially:
- Download the provider's template
- Fill out the import template with that provider's clients
- Upload under their profile to ensure the clients are uploaded under the correct provider
To do this, an owner or manager will need to first download, then upload their specific list of clients in the import file:
- Click here for steps to download from above
- Once downloaded, fill in with the above steps for either:
- Our Simple import
- Or our Advanced import
- Then go back to that specific provider's profile and upload the import file
Other Frequently Asked Questions:
live_help Can I import my client's diagnosis?
Unfortunately not at this time
live_help Can I upload my client's records
If you have chart records as a PDF we have a workaround!
Having difficulties finding this? mail Reach out to our support team for help!
You can upload by going to:
- (left menu)
- Click on the client name
- Click Docs & Forms (top right tab)
- Find the Documents On File section
- Click the (top right of section)

- For more information on the Docs & Forms tab click here