Automatic Payment in Charting
Want to cut down on the process of individually having to accept payments and charting with your clients?
This option allows you to collect a payment when you're at the end of charting, saving you time!
In this Article:
- Enable Automatic Payment in Charting
- Charting and Accepting a Payment
- Payment Logic / Information
- Disable Automatic Payment in Charting
- Have integrated credit card processing enabled
- Have at least one Credit/Debit/HSA card to be on file and set as the default card for the client
- If you are a therapist in a group practice, it requires either the client payments or financial role
Enable Automatic Payment in Charting
To access, on any screen click (top right).
phone_iphone Using a mobile device?
Access settings using the gear icon settings (top right) shown here:

- Click Billing & Ins (top right tab)
- Find the bottom section Payment Processing
- Find automatic payment in charting and click (far right):

Charting and Accepting a Payment
The following are requirements for automatic payments:
- The client must have a saved card on file
- You must have a CPT code that has a cost on it $
- If they have insurance, we recommend having the co-pay amount entered properly
Payment Logic / Information:
Here's the "system logic" of how Automatic Payment works in the system when locking a chart note, this occurs in order:
Full cost of CPT code:
- By default, a client will be charged the full cost of the CPT code selected
Adjusted cost of CPT code while charting:
- If the provider changes the CPT code cost while charting to a different amount, it will change
Example:

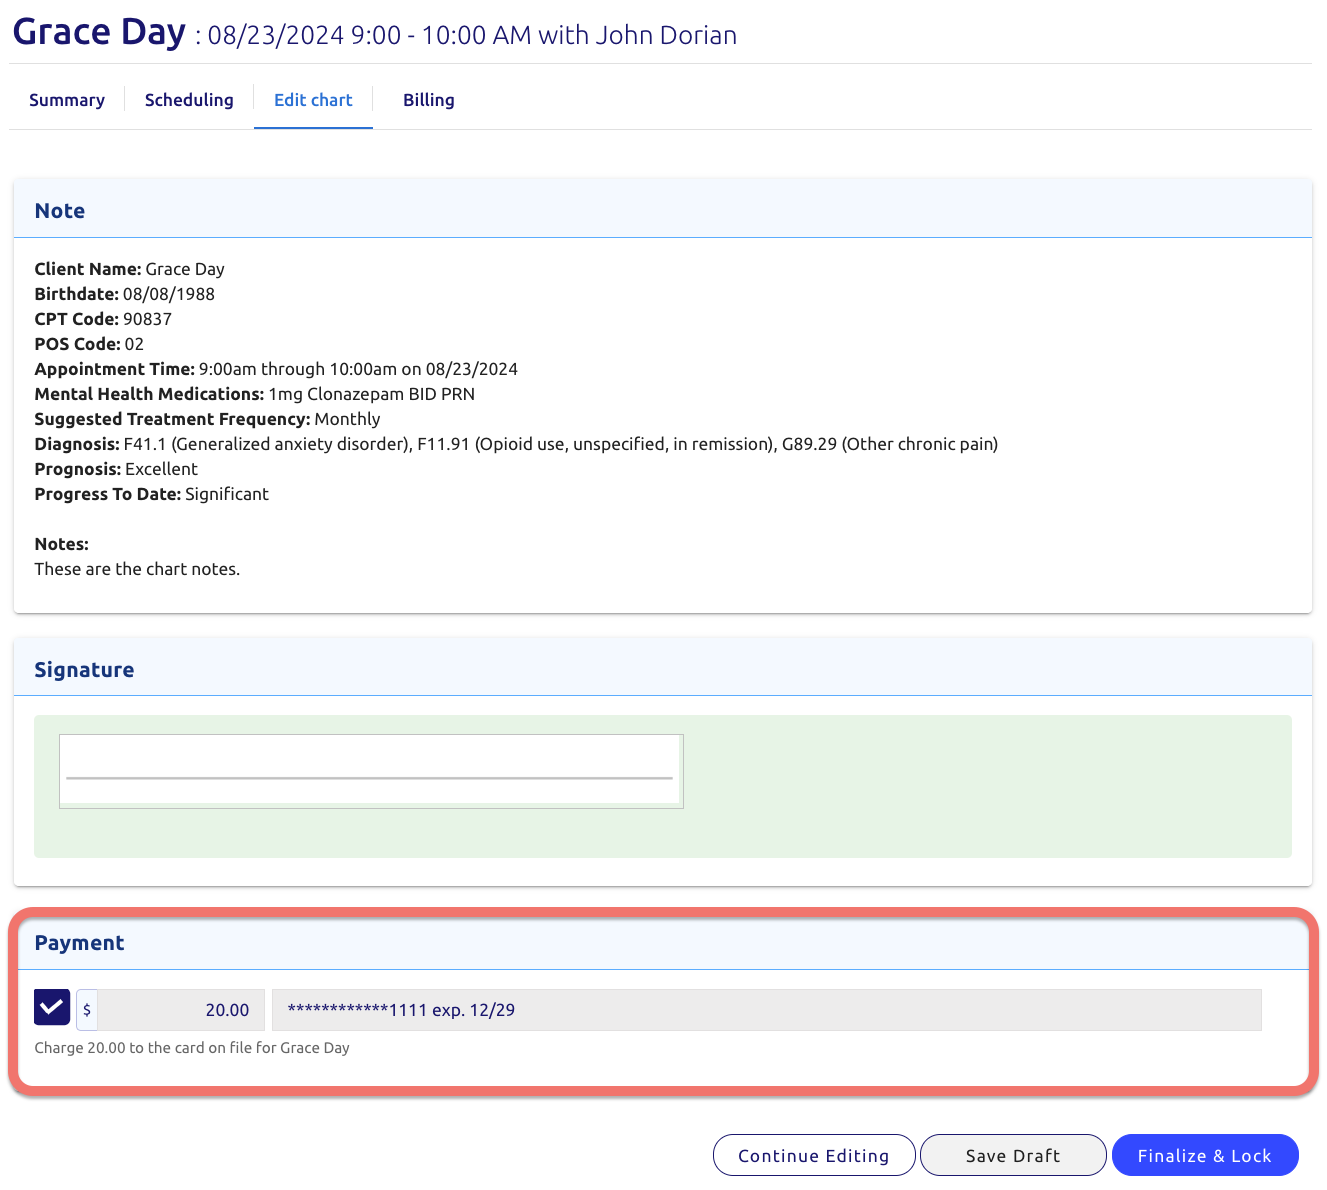
- After clicking , at the bottom find the Payment section and check off the payment:

Insurance & Co-pay entered:
- If a client has Insurance & a Co-pay amount entered, the system will instead default to that amount
- (under Client Profile → Primary Insurance → Benefits Confirmation)
Example:

Private Pay enabled
- If a client has Private Pay enabled, the system will instead default to that amount
- (under Client Profile → Private Pay, just above Primary Insurance)
Example:

local_atm Other Payment Amounts:
- If you wish to charge an amount other than what's listed, you would need to accept the payment outside this screen, or make adjustments in the various areas discussed above
- The payment amount entered on the finalize screen is read-only
- Want to charge something different?
- Uncheck the payment box and take the payment after locking the chart note
After clicking on the last charting screen, three things happen:
The chart note will be permanently locked
- Problems? Add an addendum or fully redact the chart note
The amount listed will be charged to the client's card on file
You can review the payment via the client's Billing tab on their profile, or in the overall payments history for the group under:
- Click (left menu)
- Then click (top left)
- Click Client Payments and Refunds shown here:
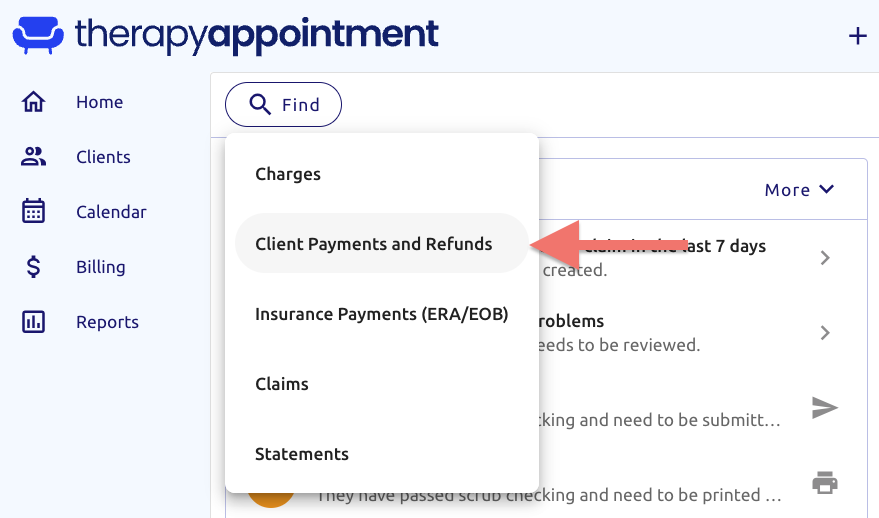
- Note the options on top (including filter filter_alt ), and results below:
Receipts of any payment type are automatically generated
- Are immediately visible on the client profile Billing tab (with applicable role) and the client portal
- For more information about receipts, please review our article: Receipts: Client Payments
Disable Automatic Payment in Charting
Tried the option and it's not for you or your group? Want more control over your billing and payments?
To access, on any screen click (top right).
phone_iphone Using a mobile device?
Access settings using the gear icon settings (top right) shown here:
- Click Billing & Ins (top right tab)
- Find the bottom section Payment Processing
- Find automatic payment in charting and click (far right):
