Telehealth - Uses and Features
This article will discuss the in's and out's of the telehealth features once you've joined a session.
The new Telehealth software works best in Google Chrome. If experiencing issues while using a different browser, switch to Chrome and try again.
Want to use an app? Click here.
In this Article:
- Joining a Telehealth Session
- In Meeting Controls
- Join by Phone
- Audit: Start & Stop Times & Recordings
- View Recordings and Transcripts (retained for 6 months)
- Share Your Screen & See Your Client
- Common Hangups
Joining a Telehealth Session
From the calendar or home screen:
- Click on the appointment, loading the appointment popup
- Find the telehealth banner near the top and click

- On the new page, click

Join Using the Application
- Launch your telehealth session in your browser with the above steps.
- The browser will prompt you to open the application if already installed (example below in Chrome):

If you don't see that, you can click which will trigger & open the TherapyAppointment telehealth application.
App not installed yet, or using an older version?
- The application should automatically inform you of a newer version, with an option to install.
- Please follow these prompts, then click Launch Meeting.
Join Using Your Browser:
Prefer to join the session with your browser instead of installing an app? We have you covered!
- Join the session by either Safari or Firefox? Try switching to Chrome first
- Still have issues in Chrome? Download our telehealth application here
To join, click the bottom text link continue in your current browser shown here:

From here, you're launched into the loading page:

Things to note:
- First, enable your microphone & camera permissions.
- Issues? Check here: Browser permission errors
- Ensure your audio and video are good beforehand here
- If needed you can pick your audio/video output source
- You should be able to see yourself with video as well as audio
- Need to configure this? Click the Settings option:

- Here you can configure options (mirroring, video source, and audio source) & test before joining.
- Once properly configured, click
In Meeting Controls
Once in the meeting, you're shown the following screen below.
Beneath it, we will break down in detail all the options available on this telehealth screen:

Top Bar Controls:

Top Left:
👥 Participant list: quick access to participants in the meeting
✔️ Encryption and Conference details: More information about the meeting, including copying meeting URL or link.
Top Right:
🖥️ Gallery View : Change between participant views
🖥️ Fullscreen: Make your telehealth fullscreen (tap escape to undo)
Bottom Bar Controls:

We've broken these down into sections, from left → center → right found below:
Bottom Left:

- More: Advanced settings for the meeting, adjust video/audio settings, test connection quality)
- Breakout Rooms (could be helpful with group telehealth sessions)
- Record: record the session for later review (recorded in same view)
- Note: Change the recording layout under the More menu.
- Whiteboard: draw or explain concepts easily with this feature
- Share: Share your screen with a client, or a file that you can both review at the same time on the screen!
- Tip: Want to share your screen and see the client? Click here for the steps.
Bottom Center:

🎥 Video (click to hide, click ^ to change video settings)
🙂 Send a reaction
✋ Raise hand
❌ End call (for all) or just leave the meeting
Bottom Right:

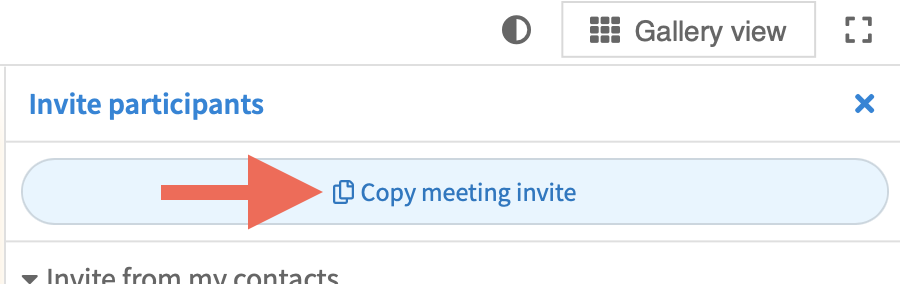
- Invite: invite another participant here or copy the meeting invite to send somewhere else
- Participants: Lists the active telehealth meeting participants with admin options
- Chat: Both public and private messaging are supported here
- Polls: Create a poll and view the results (may benefit groups)
Want to invite someone other than the client to the session?
Use the handy Invite button above, then copy the link (shown below), then share it with whomever you need to join the session!
Join by Phone
If clients prefer to join by phone, you can relay these details to them via our secure Messaging
Just go to More (bottom left) then Meeting Details:

All the client will need is the dial-in number, and access code.
Audit: Start & Stop Times & Recordings
After an appointment has ended, included in an appointment timeline will be details related to the Telehealth session.
Included are timestamps for:
- Start & End of telehealth session
- Anytime someone joins or leaves the session
- Recording details (if recorded)
To access, please follow these steps:
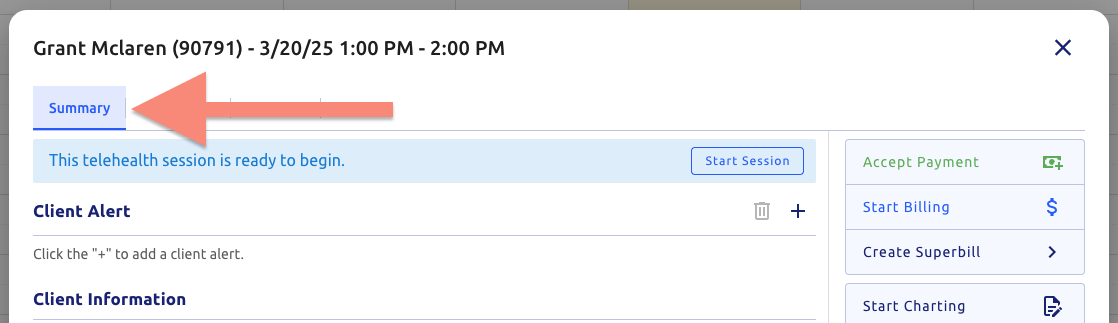
- Click on the appointment, bringing up the appointment popup
-
Click the Summary tab (top left):

- Scroll to the bottom and click Timeline to expand this section
- You should see something similar to below:


View Recordings and Transcripts
Note: Other clinical staff will see that a recording / transcript is there, but will not be able to access it.
If a video and/or transcript is generated, those details will be visible under the Summary tab of the appointment pop up.
Steps to access video recording and transcript:
- Go to your calendar or your client’s profile Appointment tab
- Click on the appointment to load the pop up
- Click on the Summary (top tab)
- Scroll down to the section Telehealth Recordings and Transcripts
- Click the item you want to download
- We open the attachment in a new pop up - save it to your desired location

Recordings are only retained for 6 months
If you'd like to retain access, you'd need to download and store the video file on your own device. Once any of this data is downloaded to your local device, TherapyAppointment is no longer liable for its security. You must maintain the proper security over the downloaded data yourself, in line with HIPAA and HITECH regulations concerning the electronic storage of Protected Health Information.Check Connection Quality
Check your speed within the session by hovering your mouse over yourself, then over the "wifi" type icon:

Hide Your Video
Don't care to see yourself as well on the screen? We have you.. covered!
To hide your own video, at the top right click Gallery, then un-toggle show myself:

Share Your Screen & See Your Client
Steps:
- While in the session, click the bottom left option Share, then Share my Screen:

- For privacy, we suggest just sharing the specific application
- So on the new prompt select the top tab Window (1)
- Alternatively, you can choose to share your entire screen or a chrome tab
- Sharing sound is only available when sharing a chrome tab
- Pick the specific window or application you wish to share (2)
- Then click Share (3):

- You should then see a screen similar to this:

Annotate
Another option once you share your application is the "annotate" feature:

- When used it will show your current application view on the right side
- Participant view will be on the left
- From here you can annotate your screen and the client will see this in realtime

problem Common Hangups
- The most common hangups revolve around permissions to your camera and microphone
- Review this resource for steps to enable your microphone and camera for each individual browser: Browser permission errors
- Running a browser other than Chrome? Switch to Google Chrome and try again for a smoother experience
- Chrome doesn't work? Revert back to Safari or Firefox and install the telehealth app: click here
- Slow or distorted audio and video? Please try running this connection test: click here
- Participants can't hear or see you? Please review this resource: click here
- Minimum requirements for audio & video for a 1:1 session are 2Mbps download (per user) and 2Mbps upload speed. For more details, click here (for comparison most streaming services require ~3Mbps download speed for 720p video streaming)
- Still having issues?
- Turn off & on your router & modem (unplug them for ~ 15 seconds)
- On Wifi?
Consider connecting to a wired connection to test.
Don't have an ethernet plug on your device? Move to a place closer to the router or consider moving your router. Avoid thick or non-wooden walls between you and the router or you may notice a weak or slow connection - Avoid network strain: ensure there are no other intensive uses of your network if on limited speed
- Check our additional resources on tips to improve quality by clicking here
quiz Having issues?
If you continue to have issues, allow us to help! Please use this template when reporting so we may assist you as quickly as possible:
- Date & Time of the appointment
- Browser you and your client are using
- Results of the above speed test (Upload & Download speed)
- Detailed description of the issue
- Any other information you feel may be helpful
- Send this information to support@therapyappointment.com